
Most tracking tutorials walk you through Google Tag Manager one click at a time. You have to work out which events to send to Meta, then build every tag, trigger and variable yourself. If you're not technical, that's a big job.
This guide is different. You'll get Claude, specifically Claude Code, to build the entire setup for you inside Google Tag Manager: browser tracking with the Meta Pixel, and server-side tracking with the Conversions API. Your part is to create two empty containers, answer a few questions, approve the plan, and test that it works.
In this guide
| Video | Step |
|---|---|
| 01:26 | How tracking works, and why browser-only isn't enough |
| 06:35 | Step 1: Create your two GTM containers |
| 11:10 | Step 2: Install Claude and create your Stape server |
| 15:55 | Step 3: Connect Claude to Stape and upload the PDF |
| 19:36 | Step 4: Give Claude your container IDs |
| 20:56 | Steps 5 and 6: Claude maps your website |
| 23:19 | Step 7: Review and approve the event plan |
| 25:59 | Step 8: Pixel ID, access token and server URL |
| 28:41 | Step 9: Test everything |
| 41:16 | Add your own tracking subdomain |
| 43:45 | Step 10 (optional): Send the data to GA4 |
How Meta tracking works, and why browser-only isn't enough
If you already know the difference between browser and server tracking, skip to Step 1.
Browser tracking
Meta gives you a script, the Pixel. You install it on your website. When someone lands on a page, the script collects things like their device and IP address, sets cookies, and sends that back to Meta. Meta uses it to say "this person clicked your ad, and now they've become a lead" and credits the conversion inside your ad account.
This worked without problems for a long time. Then iOS 14 arrived. Apple devices started stopping Meta's code from running, and Apple cut the life of its cookies, sometimes to a single day. If someone comes back to your site a few days after clicking an ad, the Pixel no longer has the cookie that ties them to that ad. Ad blockers add to the problem, because they know exactly what Meta's script looks like.
Server-side tracking
With server-side tracking you stop relying on Meta's script to collect the data. You collect it yourself, send it to your own server, and your server passes it to Meta.
Apple and ad blockers can block a Meta script. What they can't really do is stop you collecting information about your own visitors with your own system. So in this setup:
- Google Tag Manager collects the data in the browser: name, email, phone, IP, and the Facebook cookies.
- It sends that data to your own server.
- Your server forwards it to Meta through the Conversions API.
Once the data is on your server you own it. You can send it to Meta, Google Analytics, Google Ads, or anywhere else.
There are two other benefits. Your site can get faster, because you don't need every platform's JavaScript library loading in the browser. And you decide exactly what each platform receives, so you can limit it to what they need.
What you need before you start
Everything you need to open or download:
| What | Where to get it |
|---|---|
| Google Tag Manager | tagmanager.google.com |
| Claude desktop app (includes Claude Code) | claude.com/download |
| Claude extension for Chrome | Chrome Web Store |
| Setup PDF for Claude | Fill out the form on this page, it arrives by email |
| Stape account for your server | The invite arrives by email after the same form. Stape's site is stape.io |
| Stape connector for Claude | https://gtm-mcp.stape.ai/mcp (also inside the PDF) |
| Meta Events Manager | business.facebook.com/events_manager2 |
| Tag Assistant Companion (testing) | Chrome Web Store |
| Meta Pixel Helper (testing) | Chrome Web Store |
You also need a Meta Pixel, which Meta now calls a dataset, already created in Events Manager.
Step 1: Create your two GTM containers
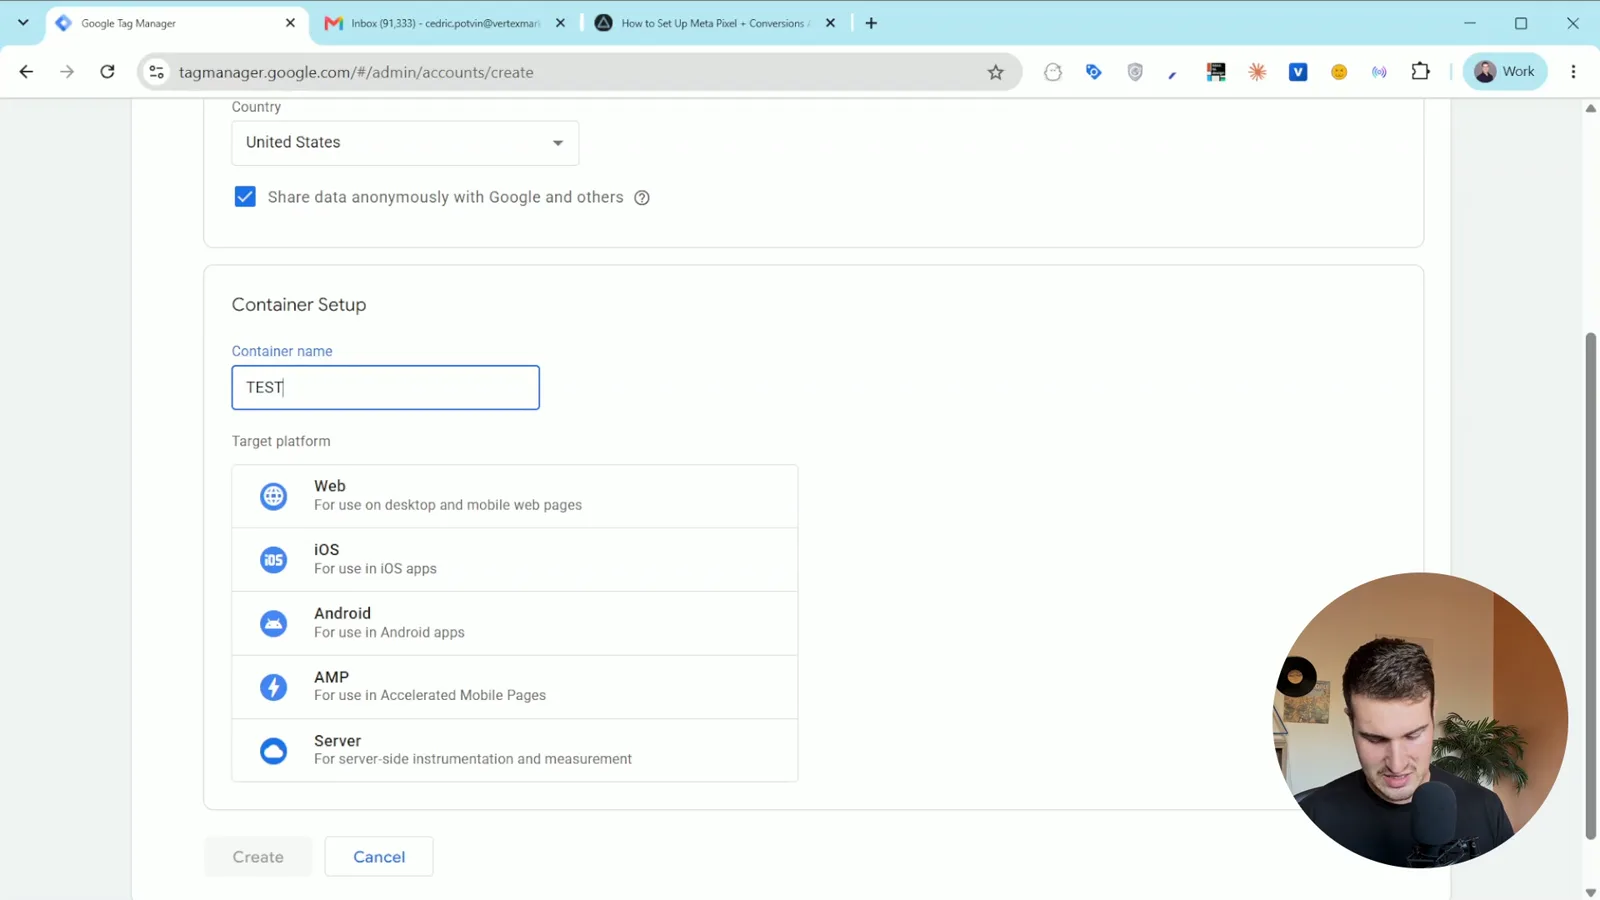
You need two containers: a web container that collects information about your visitors, and a server container that sends it to Meta.
The web container
- Go to tagmanager.google.com and click Create Account.
- Name the account after your company and enter your website as the container name.
- Choose Web as the platform and create it.
- Install Google Tag Manager on your site. If you use a platform like WordPress you can use a plugin, but we prefer Install manually: copy the code and add it to every page, immediately after the opening
<head>element. If you're not sure how, send the snippet to your developer. - Enter your website in the test box to confirm it's installed.
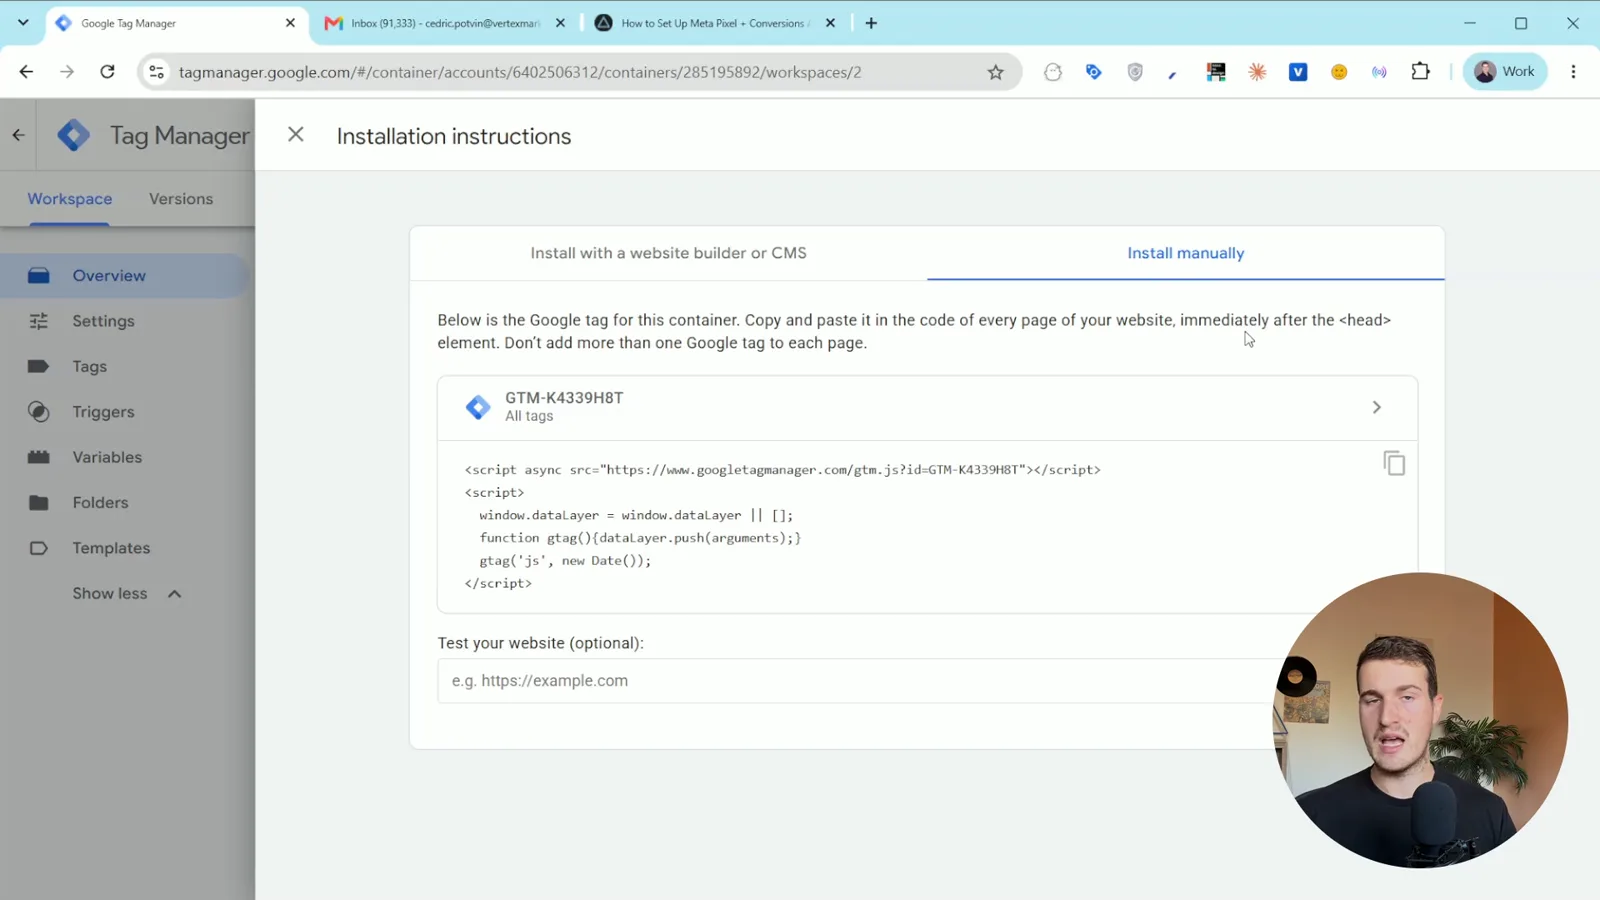
Even if you only want server-side tracking, you still need the web container. It's what collects the data in the first place. You just won't use it alone to send data to Meta.
If you already have a web container on your site, use that one.
The server container
- In GTM, go to Admin and create a new container.
- Name it something like "Your Company Server" and choose Server.
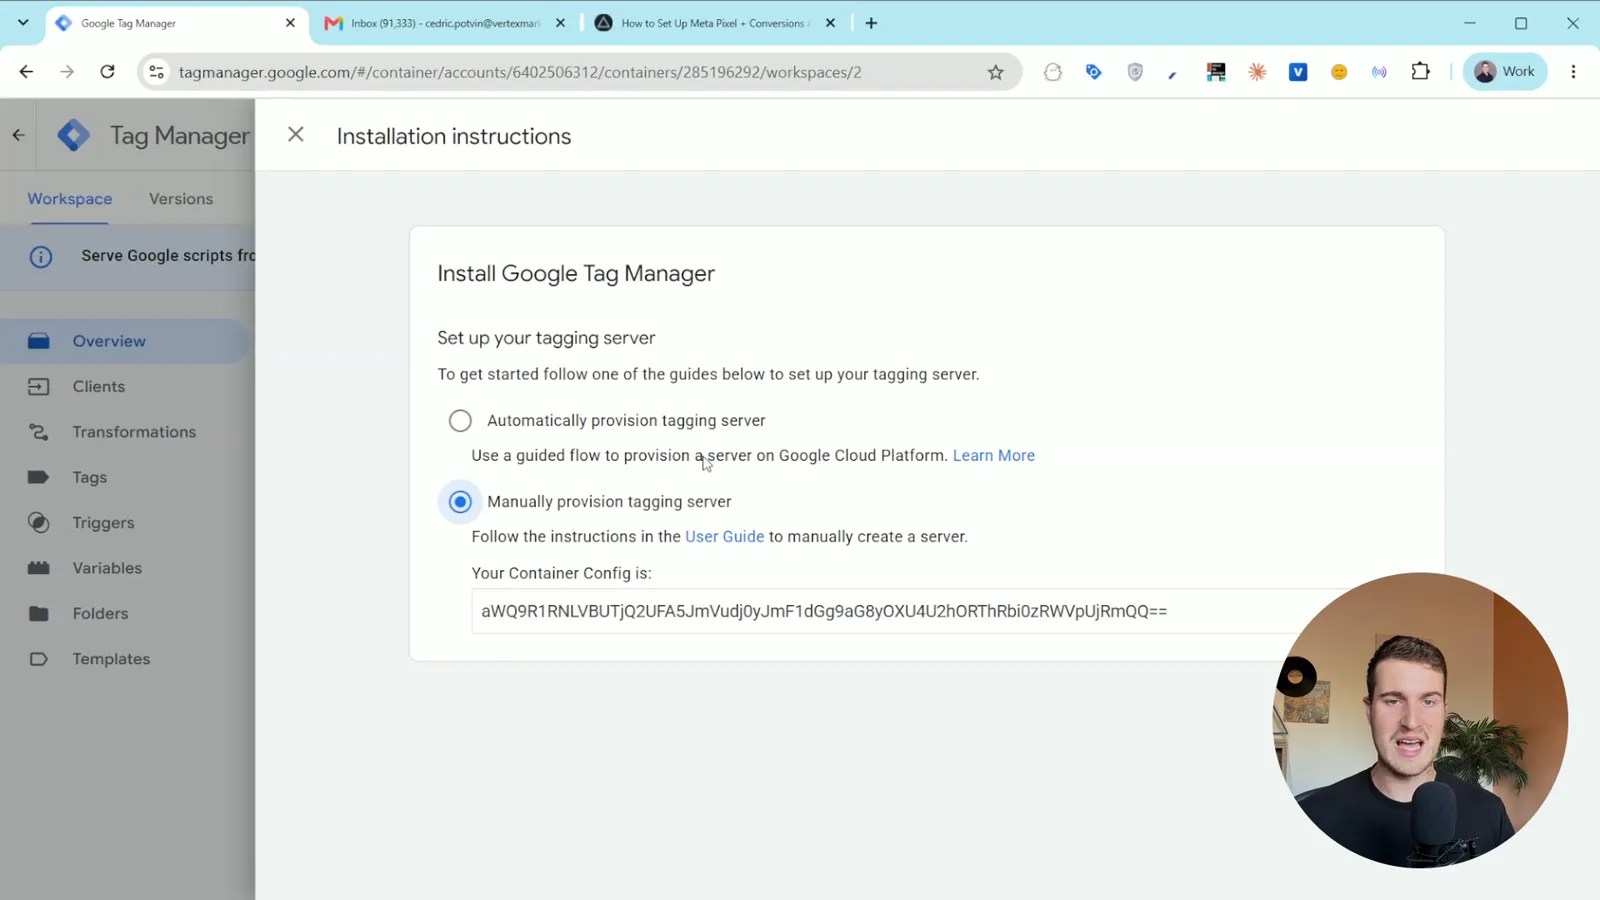
- When asked how to set up the tagging server, choose Manually provision tagging server.
- Copy the container configuration code it shows you and save it. You'll paste it into Stape in the next step.
Step 2: Install Claude and create your Stape server
Download the Claude desktop app if you don't have it yet.
Then fill out the form on this page. You'll receive two emails:
- The PDF. These are the instructions Claude follows. It asks you a few questions about your industry, your Pixel and your site, then builds the tracking.
- A Stape invite. This is where you create the server that sends your data to Meta.
Create the Stape container
- Open the Stape email, set your password and log in.
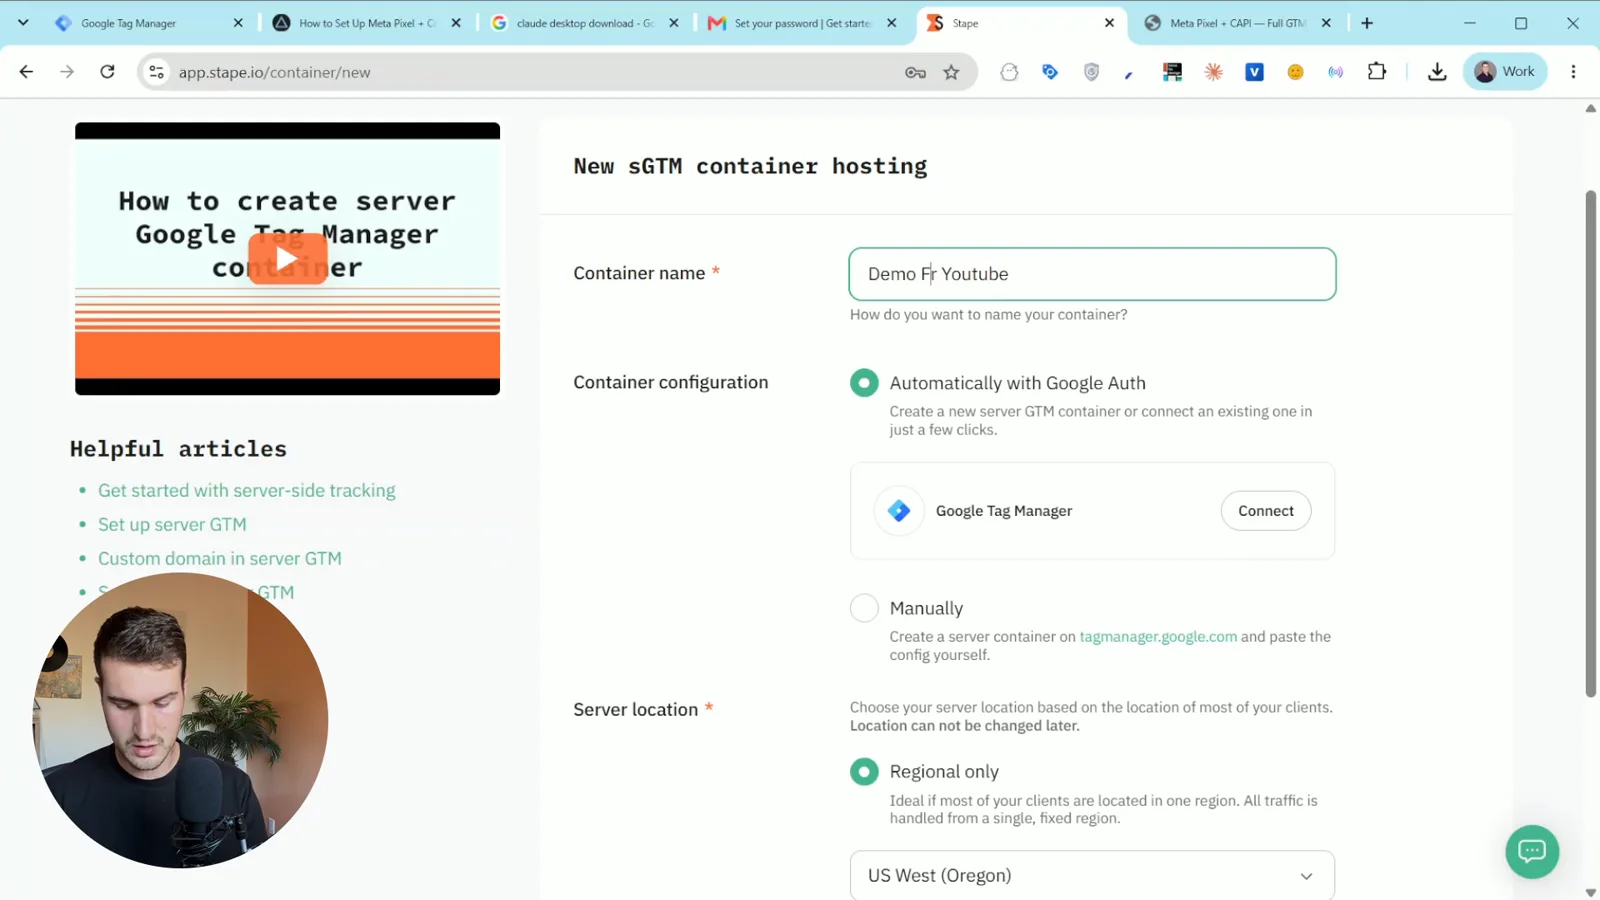
- Create a new sGTM container and name it after your company.
- Go back to GTM, switch to your server container, and copy the container configuration code from Step 1.
- Paste it into Stape, leave the server location on the regional default, and click Create.
- Pick a plan.
The free plan is fine for a small site or for testing. If you know you get a lot of traffic, the Pro plan is $20 a month.
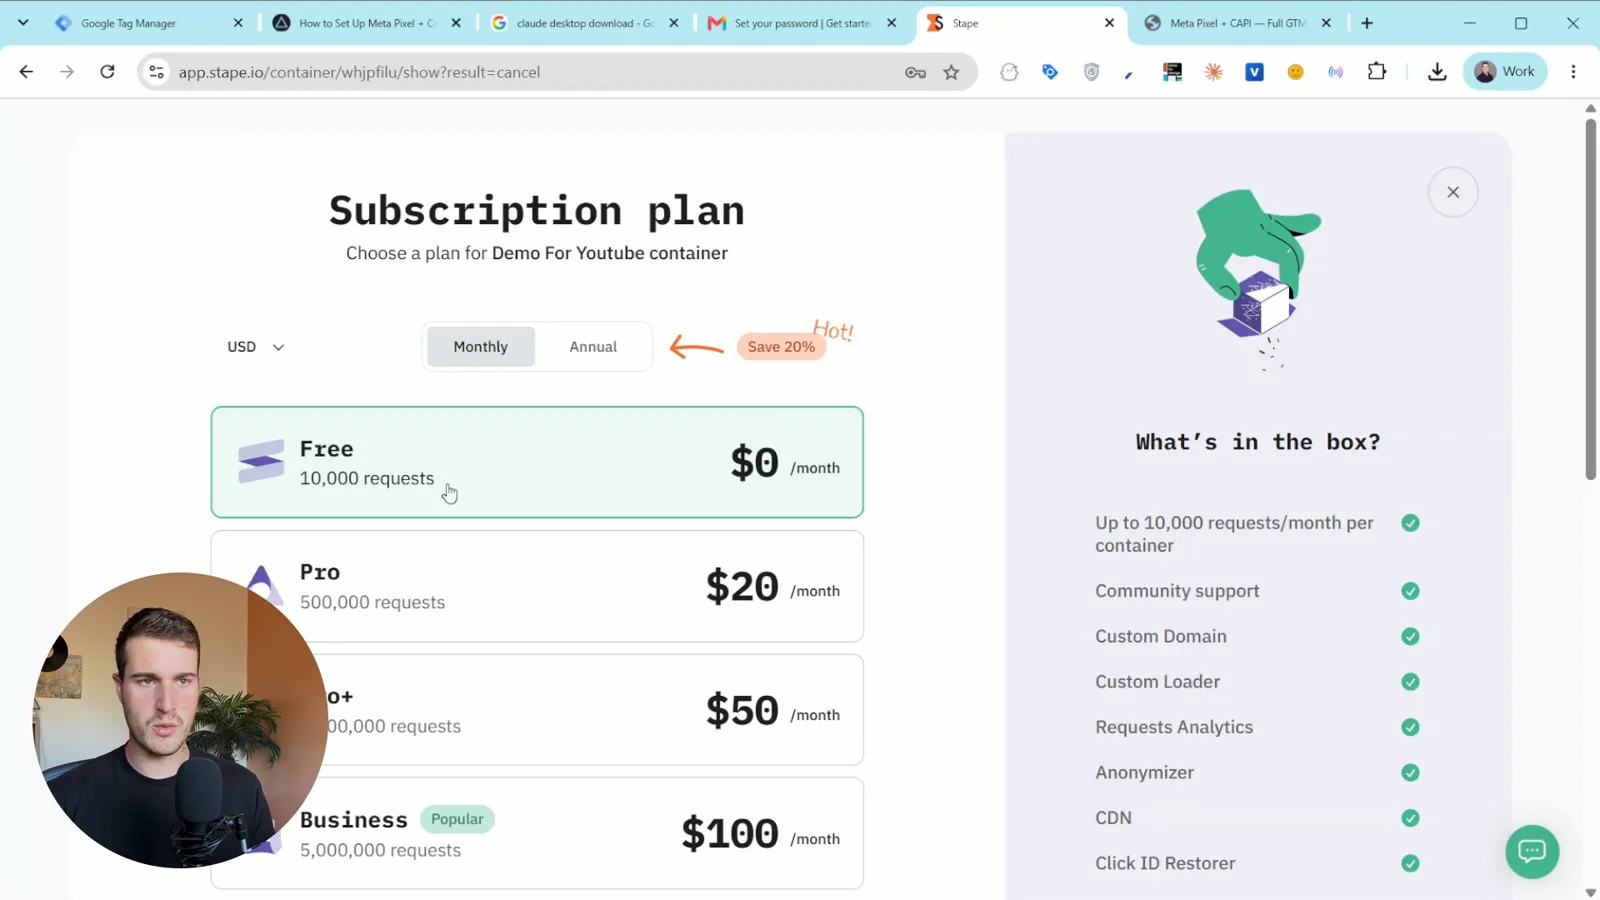
When it's done, Stape shows the container as active and running.
Step 3: Connect Claude to Stape and upload the PDF
Three small things to set up, then Claude takes over.
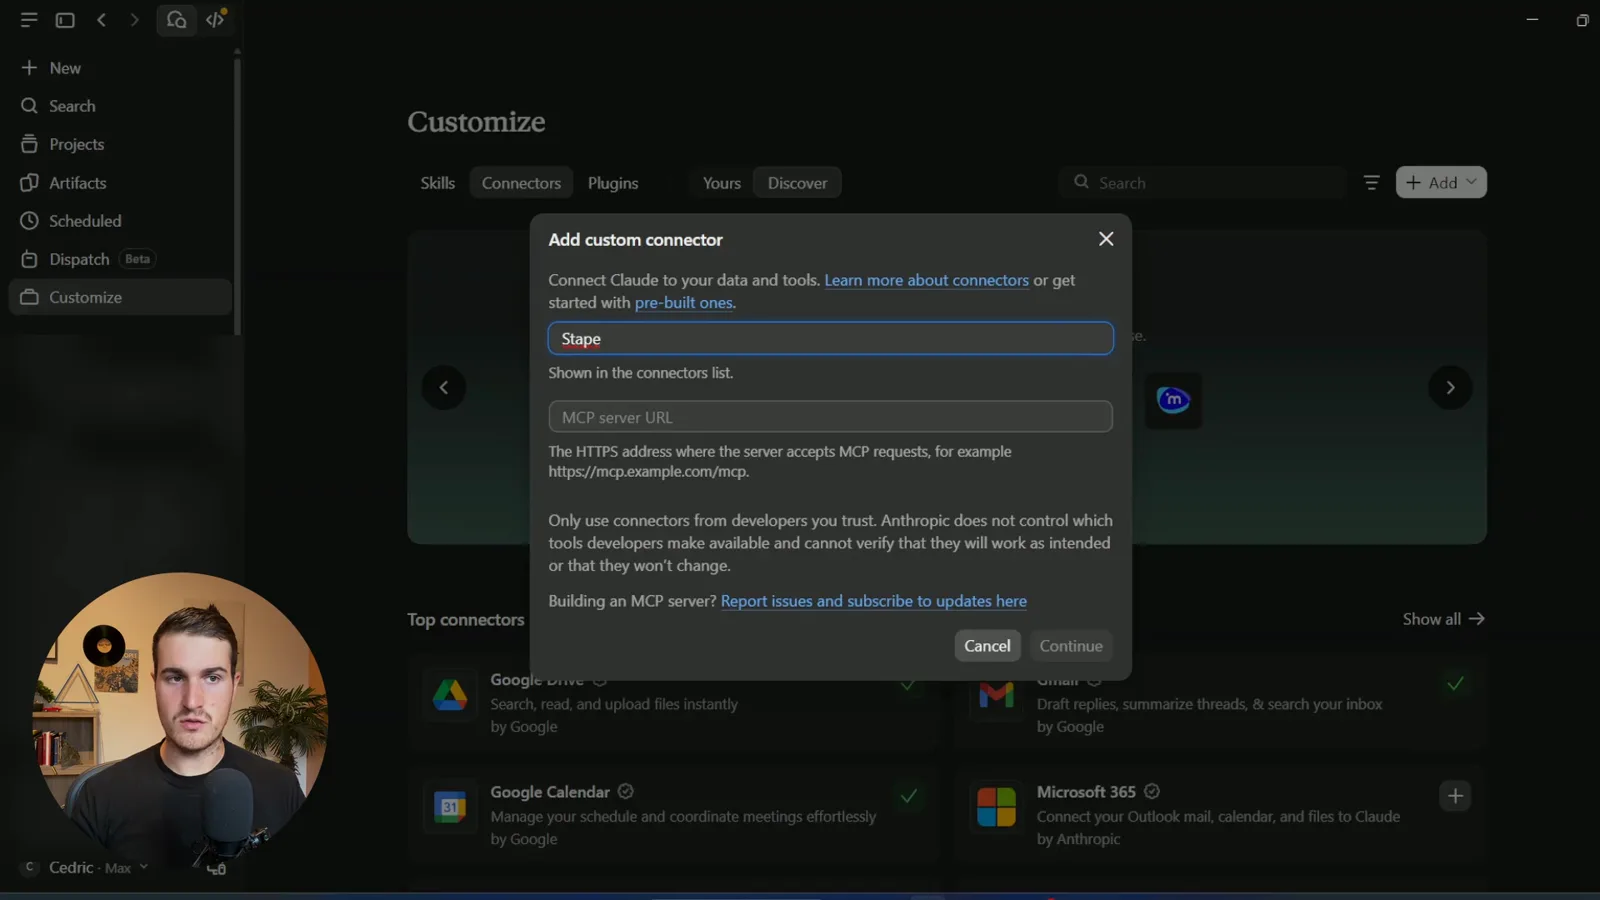
Add the Stape connector
- Open the PDF and copy the connector link inside it:
https://gtm-mcp.stape.ai/mcp - In the Claude desktop app, open Connectors and click Add a connector.
- Name it "Stape" and paste the link into the MCP server URL field.
- When asked, choose Sign in now, then Register automatically, and complete the Google sign-in.
Leaving the permission setting on "ask first" is fine. Claude will check with you before it does anything major.
Install the Claude extension for Chrome
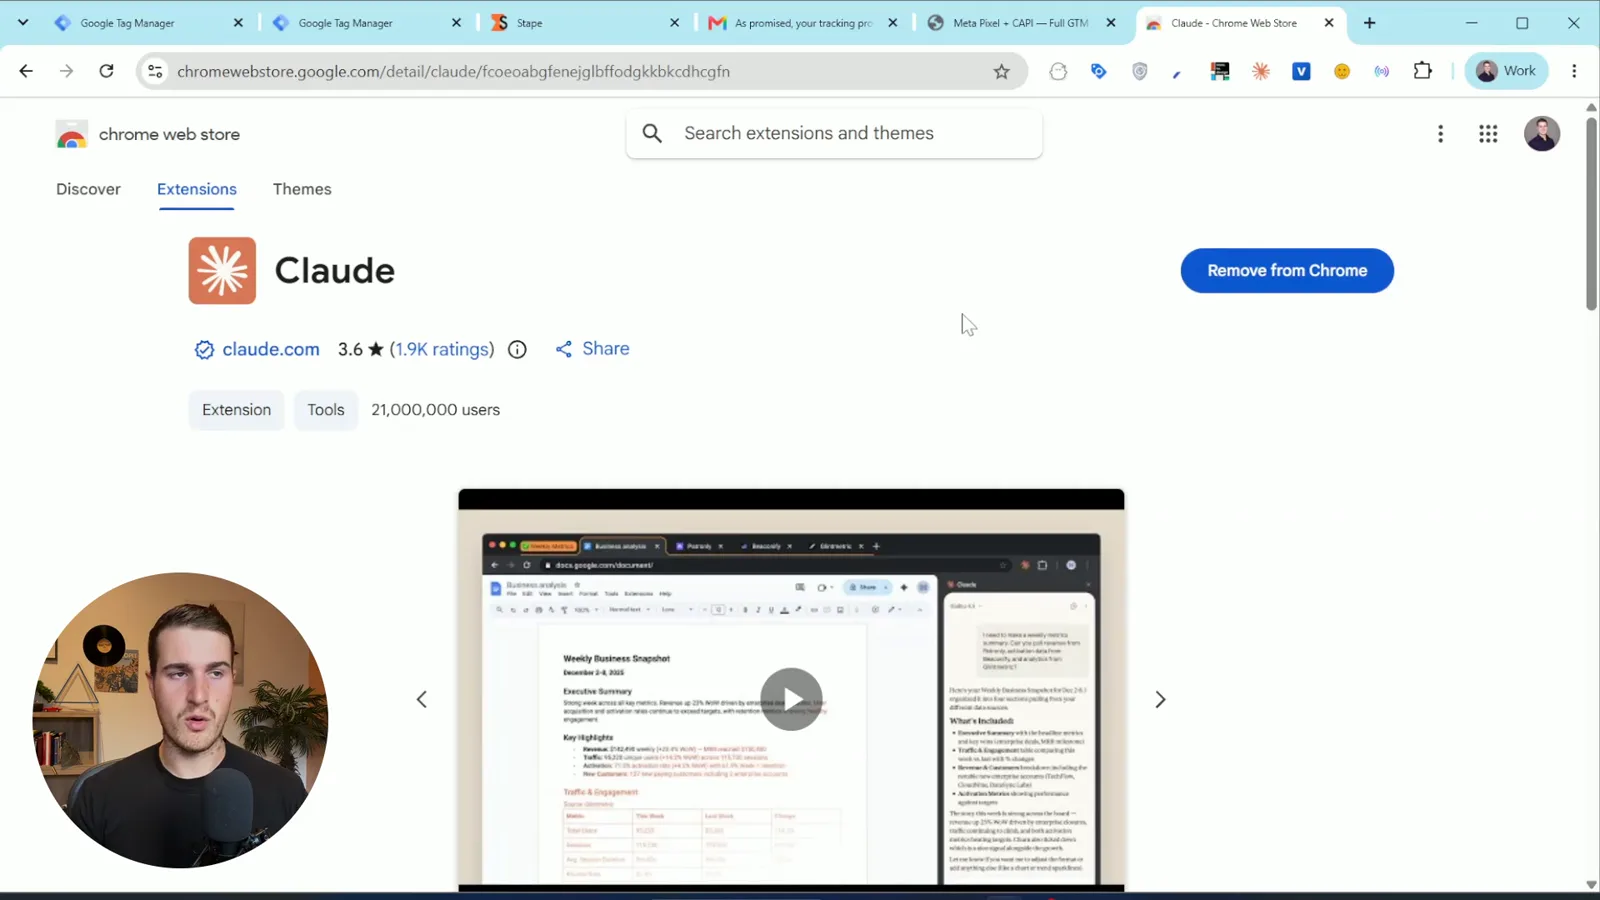
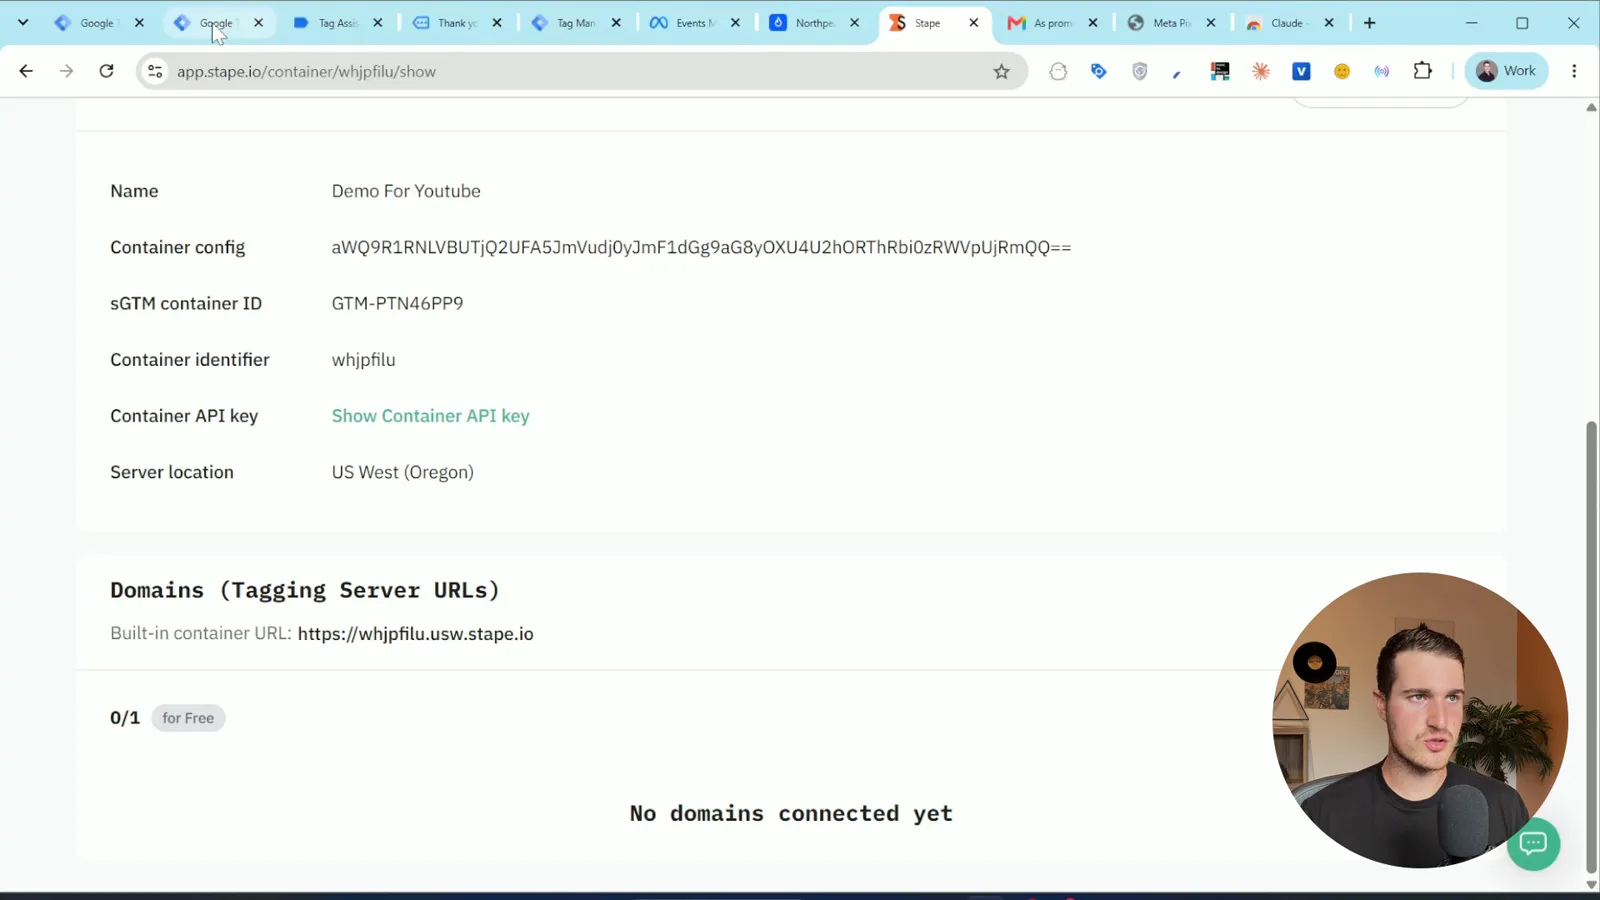
Add the Claude extension from the Chrome Web Store. This lets Claude open your website, look at your pages and forms, and work out which events to track and what should trigger them. Without it, Claude can't analyze your site.
Create an empty folder
Make a new folder anywhere on your computer and call it something like "tracking". Claude uses it to save any code it writes.
Start the conversation
- In the Claude desktop app, open Claude Code and start a new conversation.
- Choose this computer as the environment, click Open folder, and select the folder you just made.
- Click Trust workspace.
- Upload the PDF.
Why Claude Code and not a normal chat? Tags, triggers and variables in GTM are mostly code. Claude Code understands them, so if something goes wrong with the connector or a tag, it can look at the problem and help you fix it.
Step 4: Give Claude your container IDs
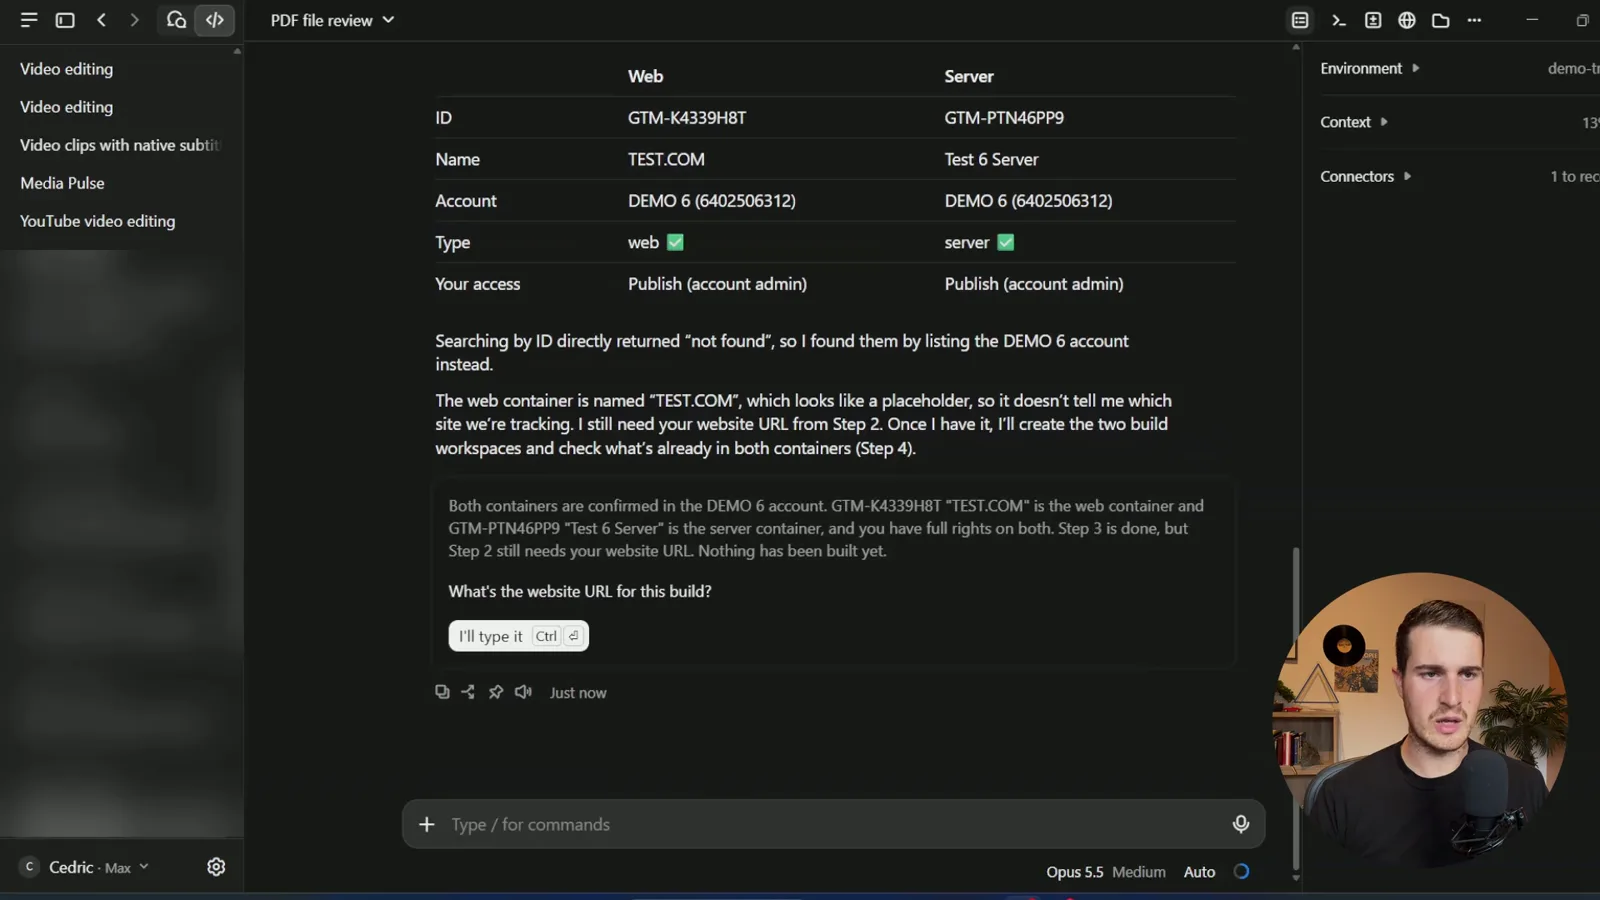
After reading the PDF, Claude needs to know which containers to work in. Copy the container ID from the top of GTM for each one and send both:
Web container: GTM-XXXXXXX
Server container: GTM-YYYYYYY
If you only have one GTM account connected, Claude may find them without asking.
Steps 5 and 6: Claude maps your website
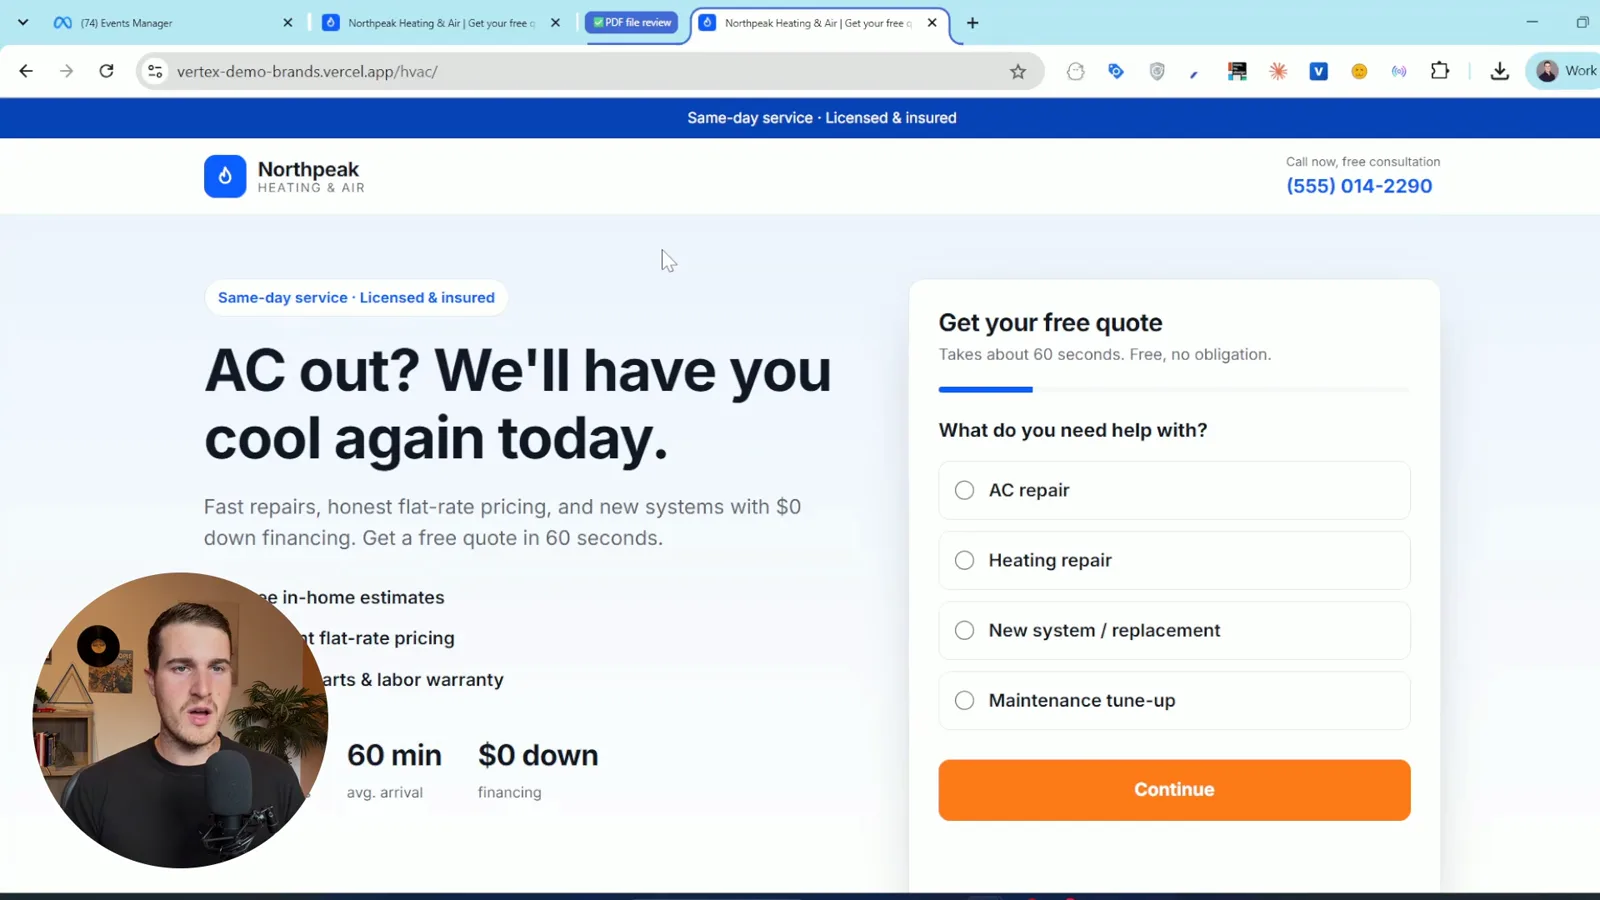
Claude will ask for your website URL. Give it the page your ad traffic actually lands on. If your Facebook ads send people to a specific landing page, use that. If they go to your main site, use that.
Claude then opens the site, maps it out, and asks if it can submit your form with test data. This is how it learns which fields exist and what should count as a lead. It tells you the exact details it plans to use.
You'll see the cursor move by itself as Claude clicks through your form. Each prompt in this build takes between one and five minutes, so it's a good time to check your email.
Step 7: Review and approve the event plan
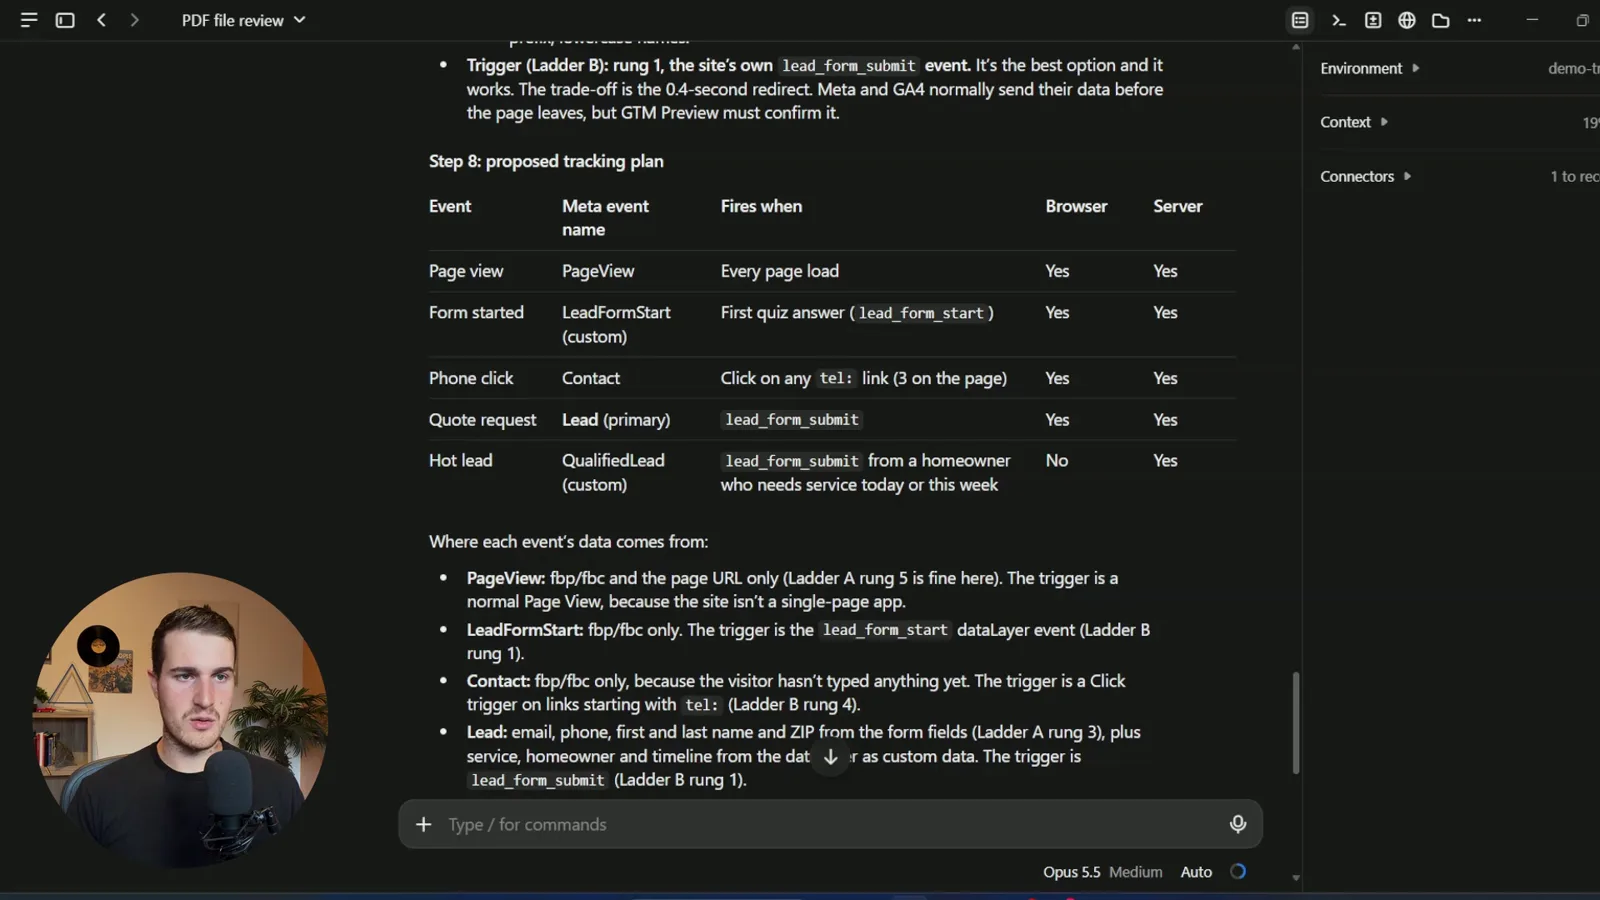
This is the part you need to read. Claude comes back with a list of every event it plans to send. For the demo site in the video, a home-services lead form, the plan looked like this:
| What the visitor does | Event sent to Meta | Type |
|---|---|---|
| Lands on a page | PageView | Standard, browser and server |
| Answers the first form question | Lead form start | Custom |
| Clicks the phone number | Contact | Standard |
| Submits the full form | Lead | Standard |
| Submits as a homeowner who needs service today | Qualified lead | Custom, server only |
You can change any of it by typing. Rename a custom event, turn a custom event into a standard one, or tell Claude to remove an event you don't want to send.
Why the qualified lead event matters
You don't always want Meta optimizing for every lead. You want more of your best leads.
Here Claude noticed that a homeowner who needs service today is a hot lead, so it sends a separate event when that happens. That gives you two options in Ads Manager:
- Keep optimizing for Lead, and add the qualified lead event to your columns to see which ads and campaigns bring in the hot ones.
- Once you have enough volume, optimize for the qualified lead event itself, so Meta goes looking for more of those people.
When you're happy with the plan, tell Claude to approve and build it.
Step 8: Give Claude your Pixel ID, access token and server URL
Claude now asks for a few details.
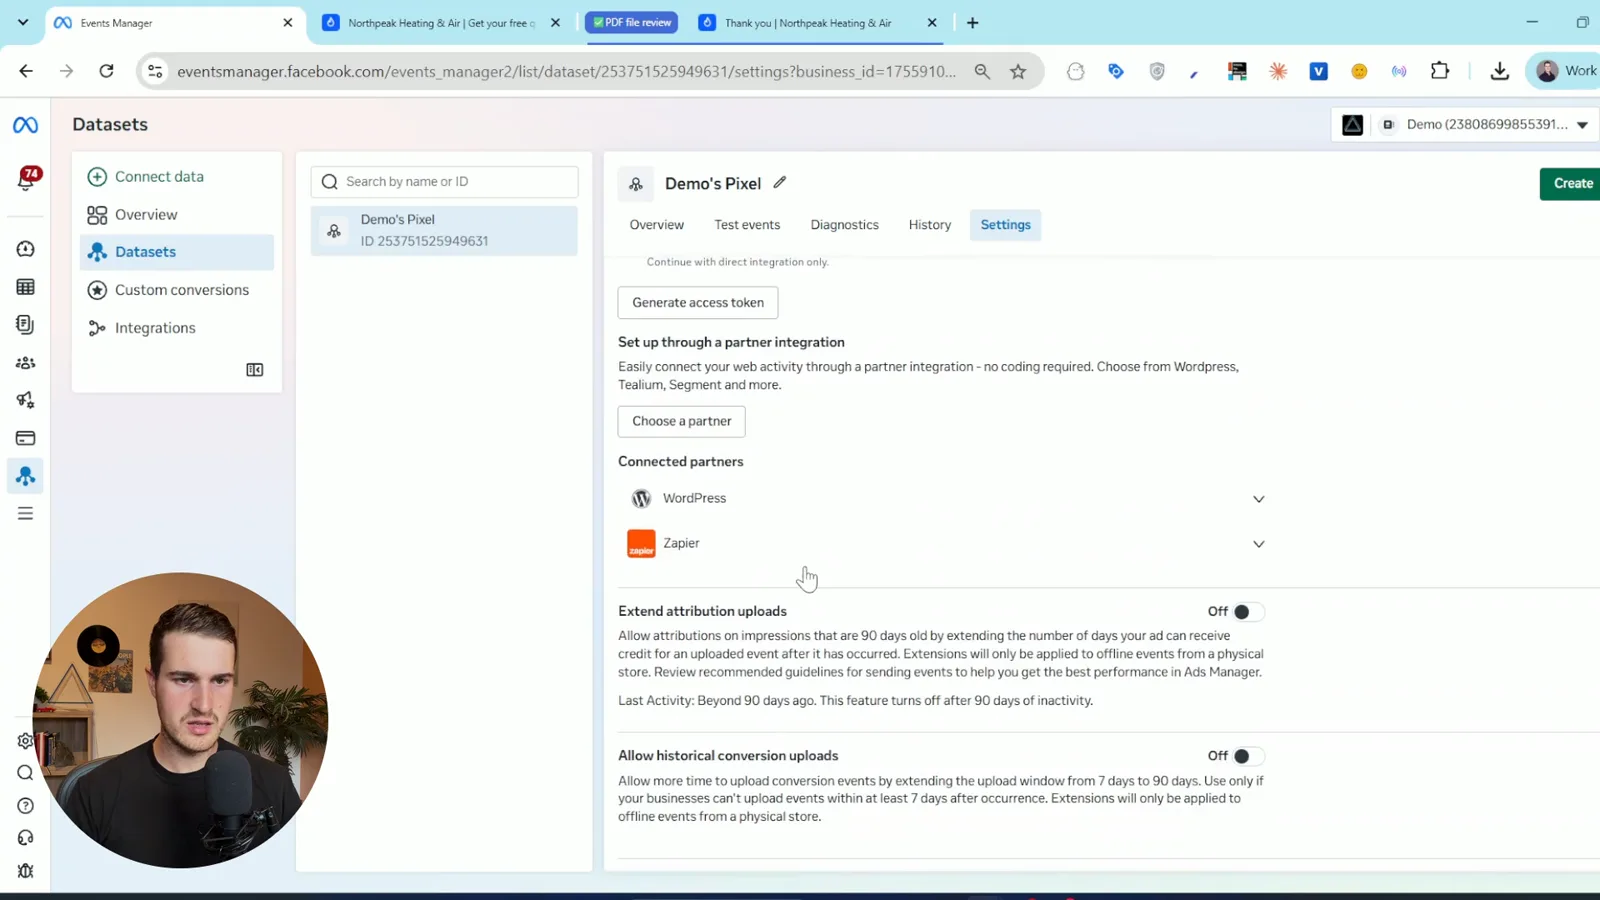
- Meta Pixel ID. In Events Manager, open your dataset and copy the ID.
- Conversions API access token. In Events Manager, go to Settings, scroll down to the Conversions API section, and click Generate access token.
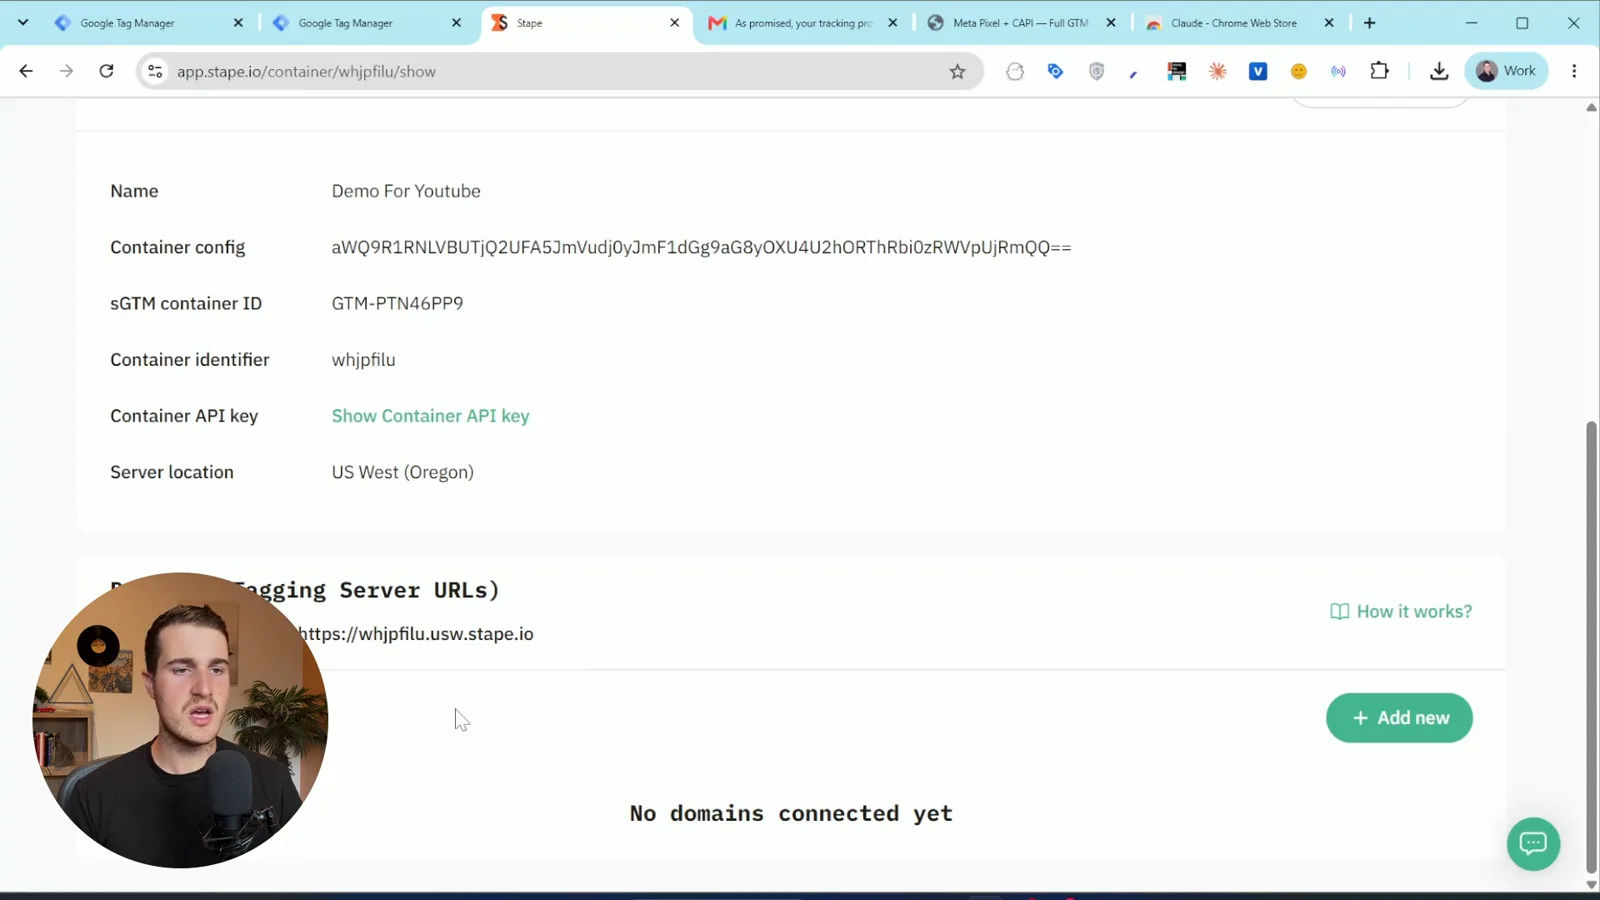
- Server URL. In Stape, open your container and copy the tagging server URL it gives you. You'll swap this for your own subdomain later.
- GA4 measurement ID. You don't need a real one for Meta tracking to work. If you're not setting up GA4, tell Claude to use a dummy one.
Facebook Pixel ID: 1234567890
FB API token: (paste your token)
sGTM URL: https://your-container.stape.io
GA4 measurement ID: use a dummy one
Claude then builds everything in both containers: the tags, the triggers, and the variables that pull the email, phone number, first name and last name from your form.
Step 9: Check the build, then test it
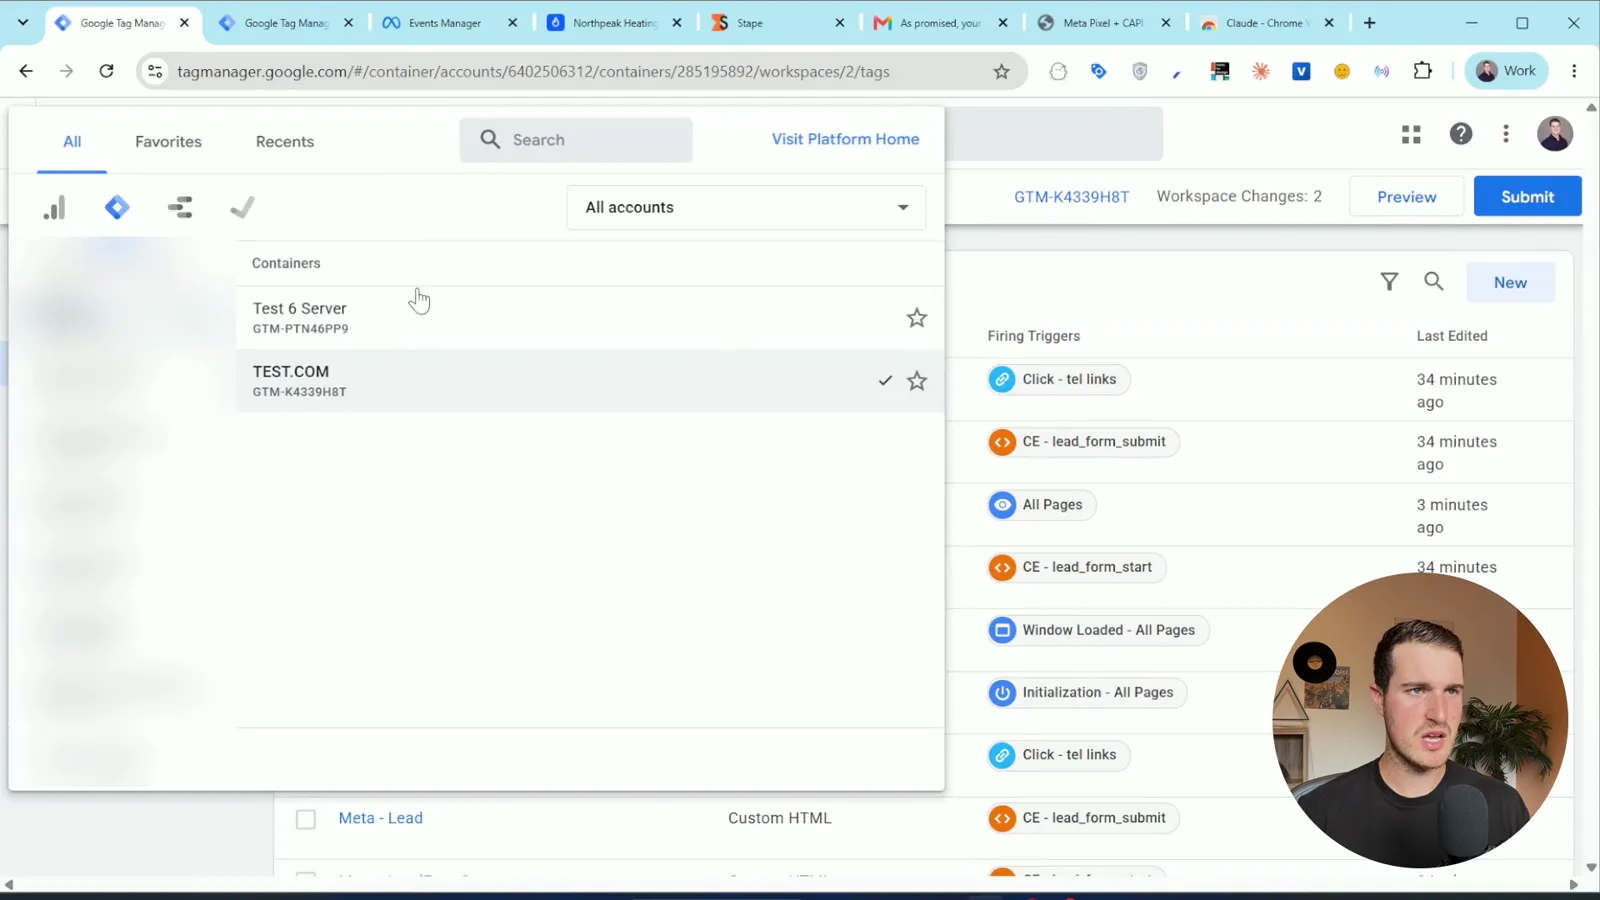
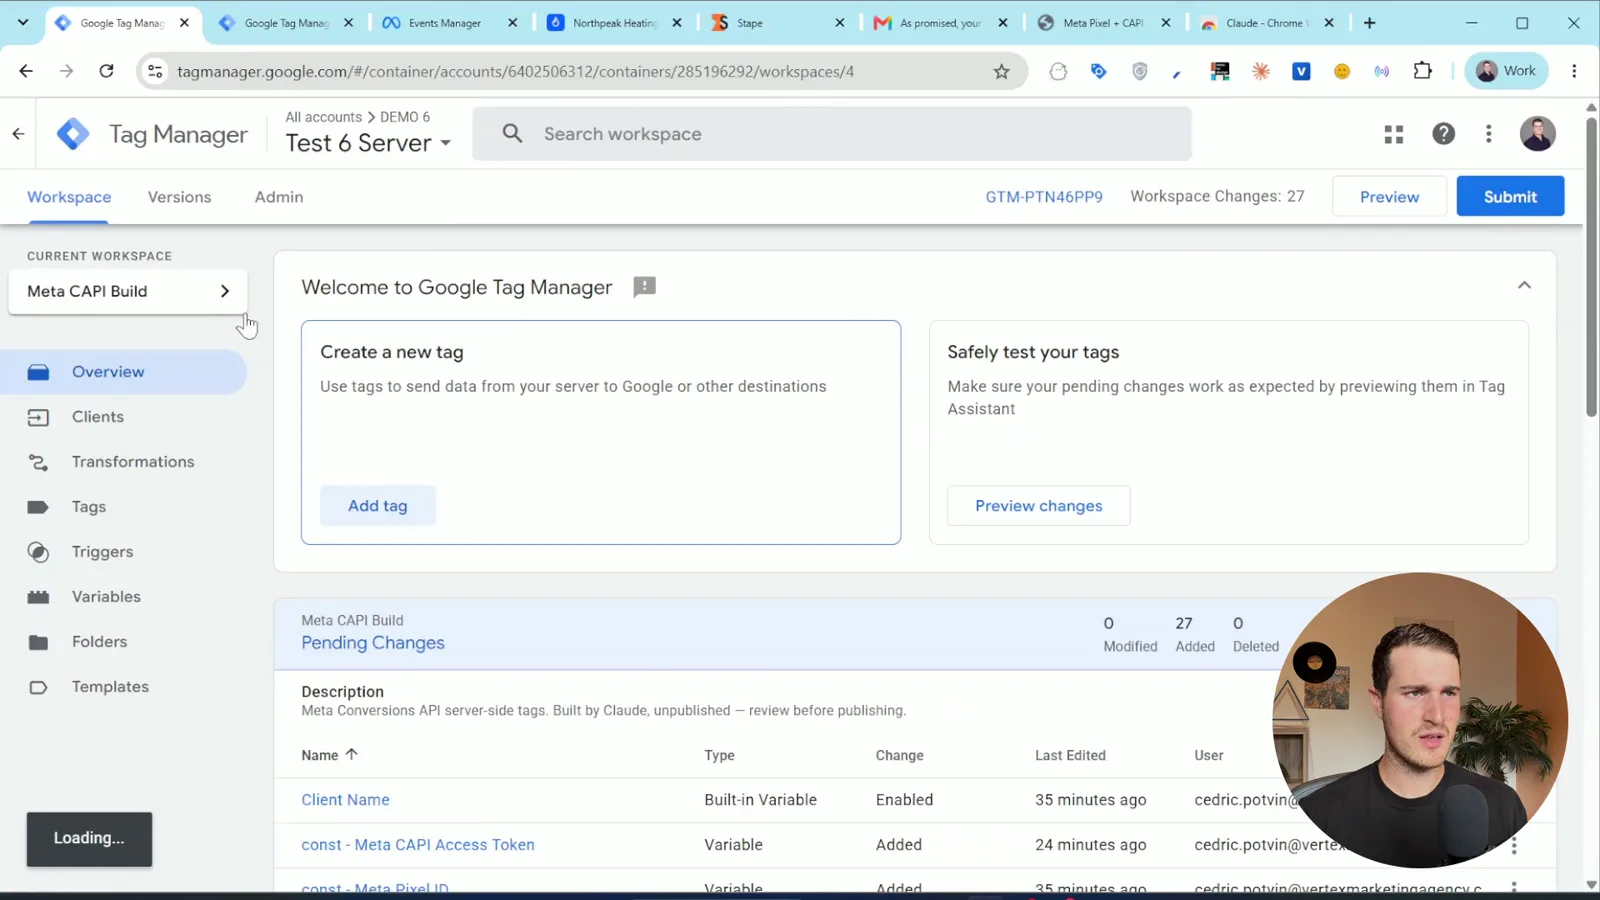
Claude works in its own workspace in each container, separate from your default one. Use the workspace dropdown in GTM to switch to it. It will have a name that mentions Meta.
Check the server container
- Open Tags. You'll see one Conversions API tag per event. Open one and confirm it has your Pixel ID, an access token, an event ID and the page location.
- Check the country value. If it's fixed to US and you're somewhere else, change it.
- Open Variables and paste your access token into the access token variable. Claude often leaves a placeholder here because it avoids handling secret keys. That's normal.
- Confirm the Pixel ID variable is correct.
- Go to Admin, then Container Settings, paste your Stape server URL, and save.
Check the web container
Switch to the web container, select Claude's workspace, and open Tags. You'll see two groups:
- Tags labelled Meta send data straight from the browser to Meta. This is your browser tracking.
- Tags labelled GA4 send data to your own server. Despite the name, they have nothing to do with Google Analytics here.
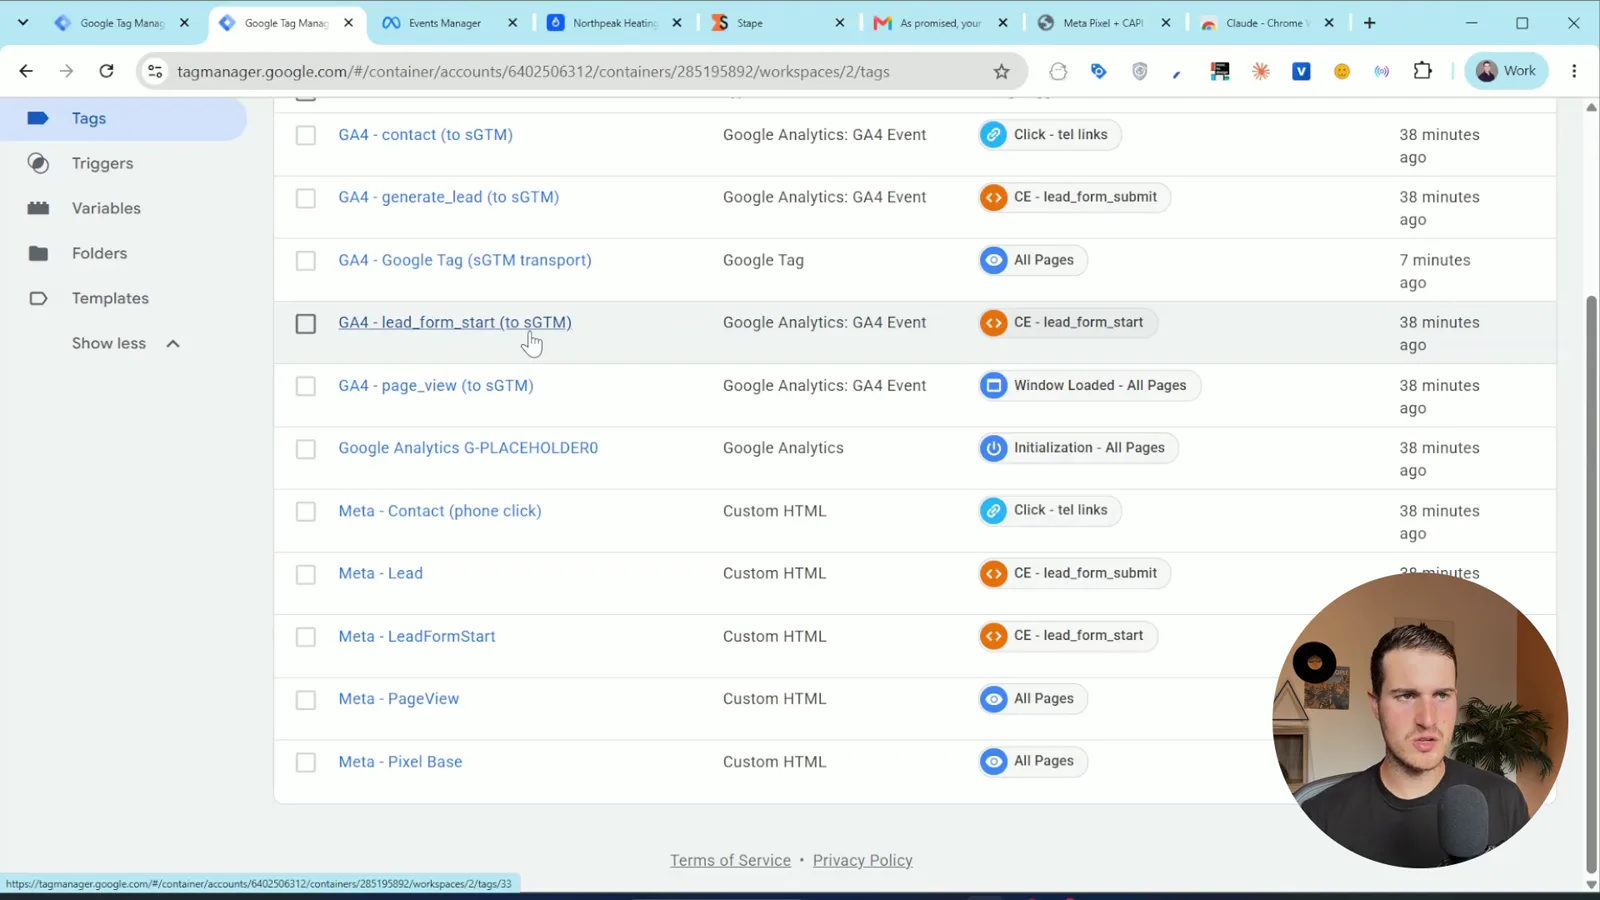
The GA4 tag is used because it already collects the visitor information you need, and it has a setting that redirects where that information goes. When that parameter is named transport_url, the tag sends everything to your server and not to Google. If Claude named the parameter something else, rename it to transport_url.
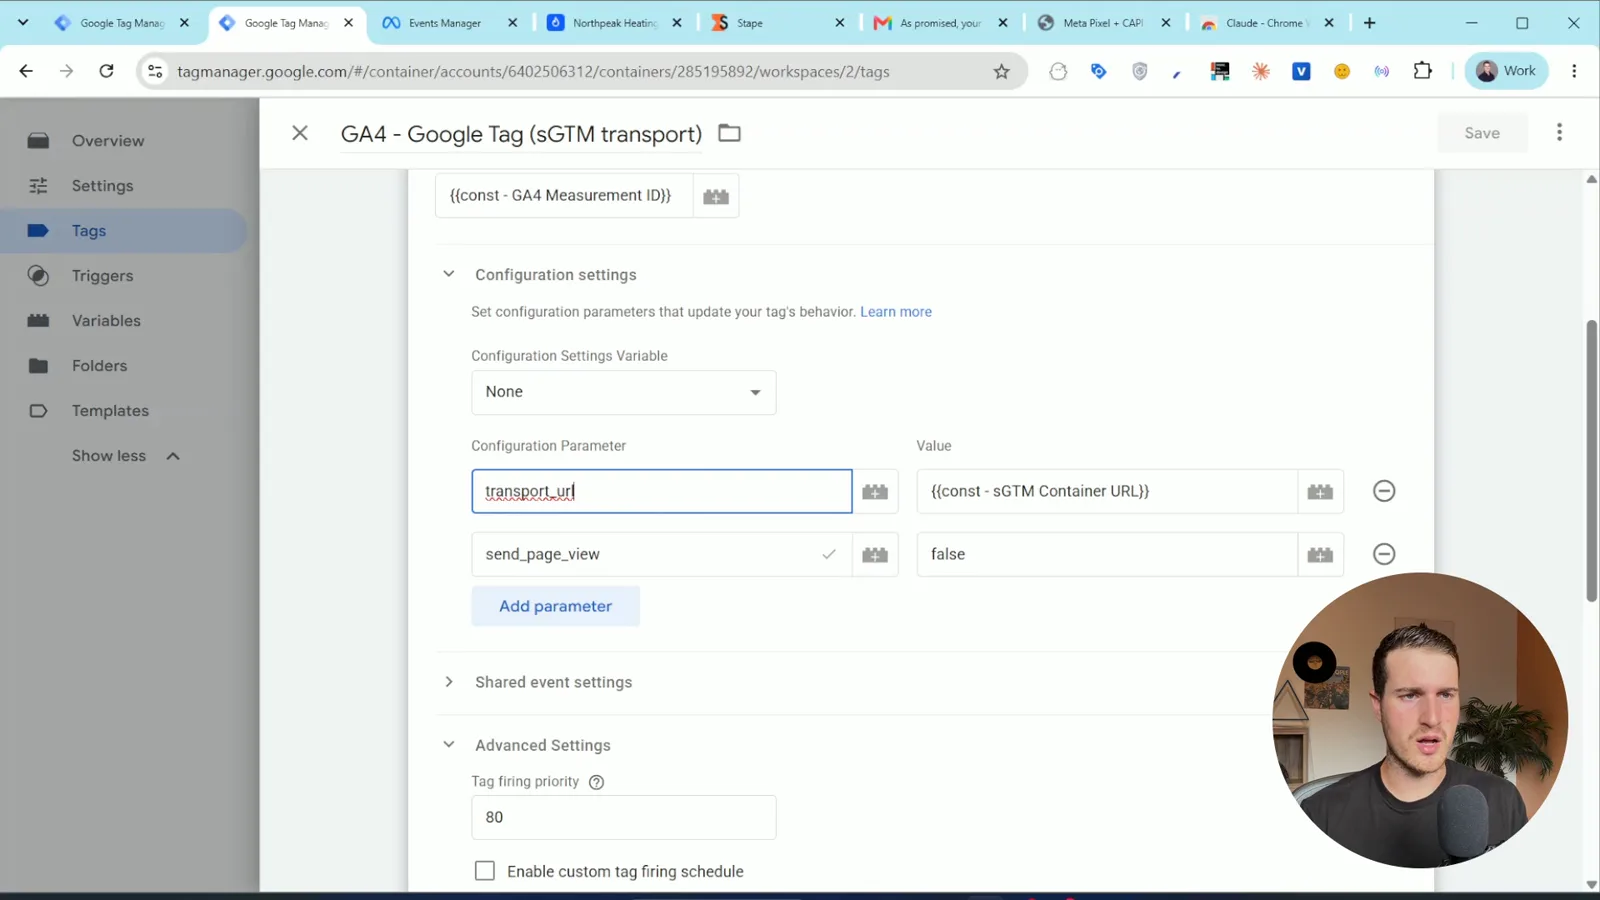
Then open Variables and fix the GA4 measurement ID. It can't stay as the placeholder Claude left, or the setup will fail. Use your real ID, or if you're not using GA4, put in G-123456.
Run the test
Always preview the server container first, then the web container.
- In the server container, click Preview. The debug screen opens on your Stape address.
- In the web container, click Preview and enter your website.
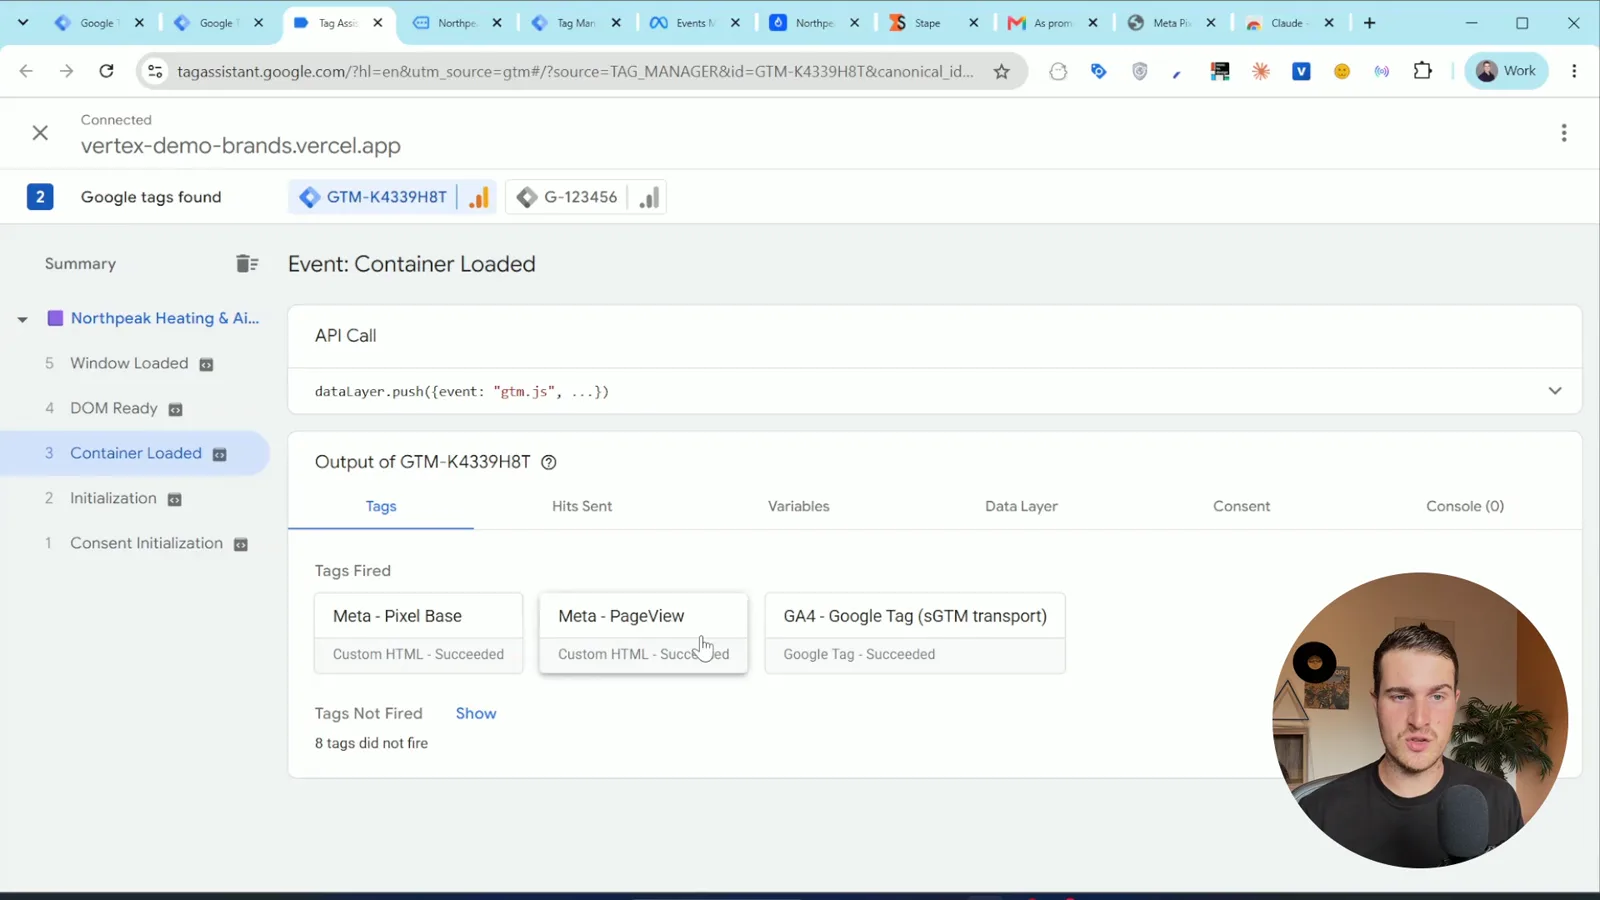
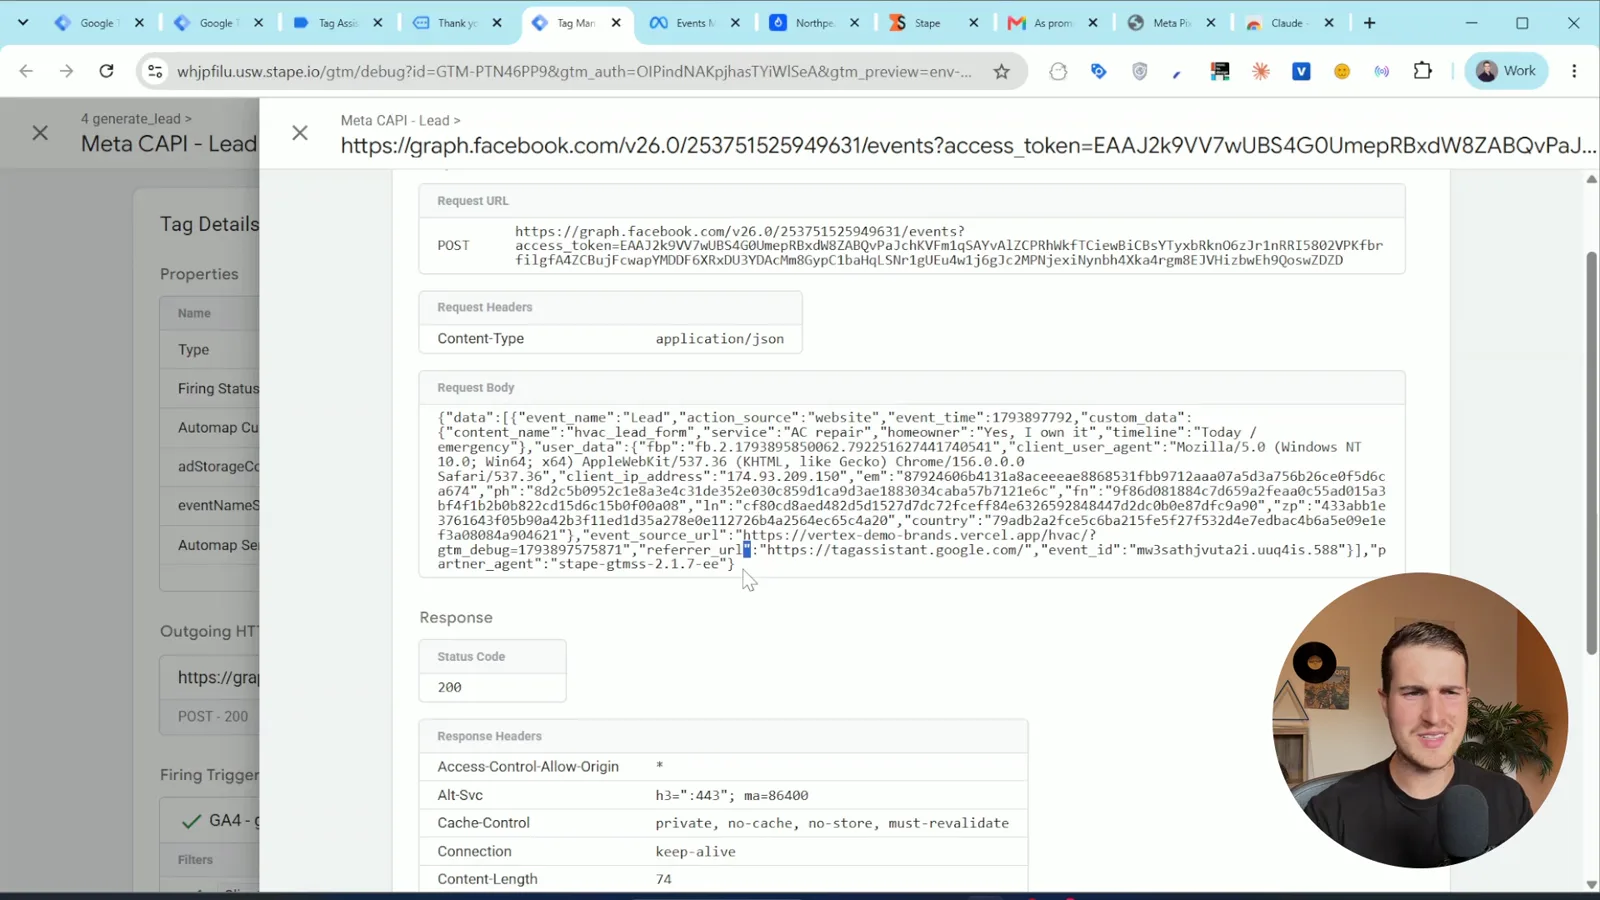
- Check the page view. In the web preview, click Container Loaded. You should see the Meta base pixel, the Meta PageView, and the tag that sends the page view to your server. In the server preview you should see a PageView marked Succeeded. If you open the outgoing request, the response code should be 200.
- Do every action from your plan on your site: click the phone number, start the form, submit the form. After each one, a new event appears in the left sidebar of both previews. Confirm the right tags fired and succeeded.
- Submit the form in the way that should count as a qualified lead and confirm that event fires too.
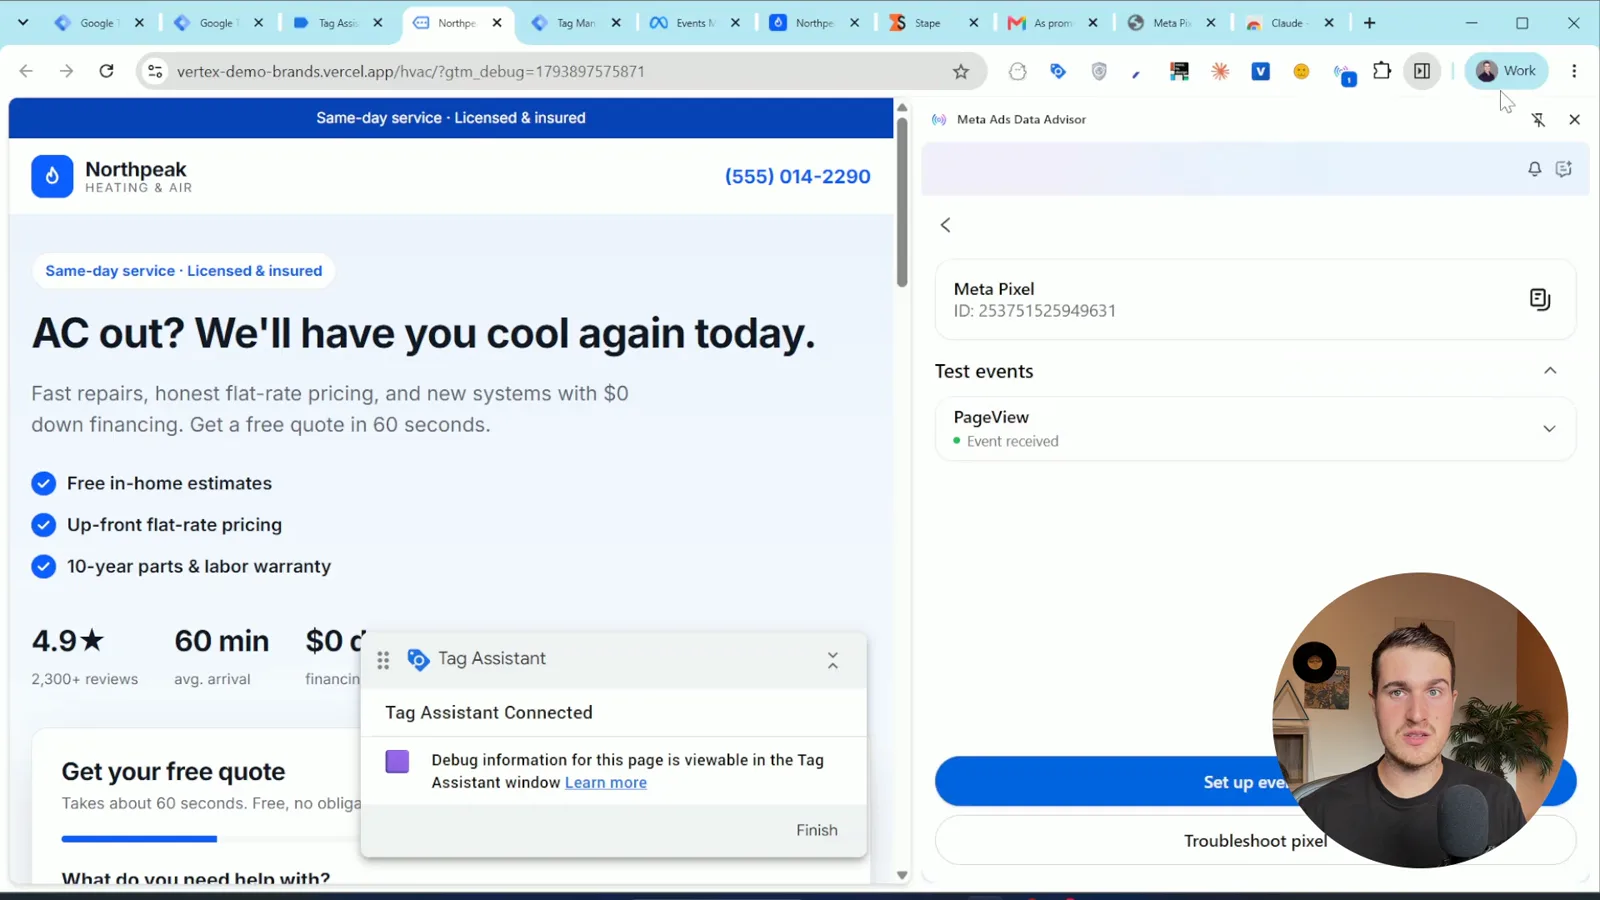
Two Chrome extensions make this easier. Tag Assistant Companion opens the preview in its own tab. Meta Pixel Helper shows which Pixel events fired on the page.
Check the customer data
In the server preview, open the Lead event and look at the outgoing request. You'll see values like ph for phone and em for email, each one a long unreadable string. That's correct. The details are hashed before they're sent, and Meta matches them against Facebook profiles on its side.
This is the part most setups miss. If you send a Lead event with no name, email or phone attached, the box is ticked but Meta has far less to work with when it optimizes your campaigns.
Add your own tracking subdomain
So far your server runs on a Stape address. The point of server-side tracking is to keep things first-party, so move it to your own domain. You can do this on the free plan.
- In Stape, open your container and click Add new under custom domains.
- Enter a subdomain, not your root domain. Common choices are
ss.yourdomain.com,gtm.yourdomain.comorsgtm.yourdomain.com. The name is only a label, but it must not already be in use. - Choose the automatic option. Stape logs you in to your domain provider and adds the DNS record for you.
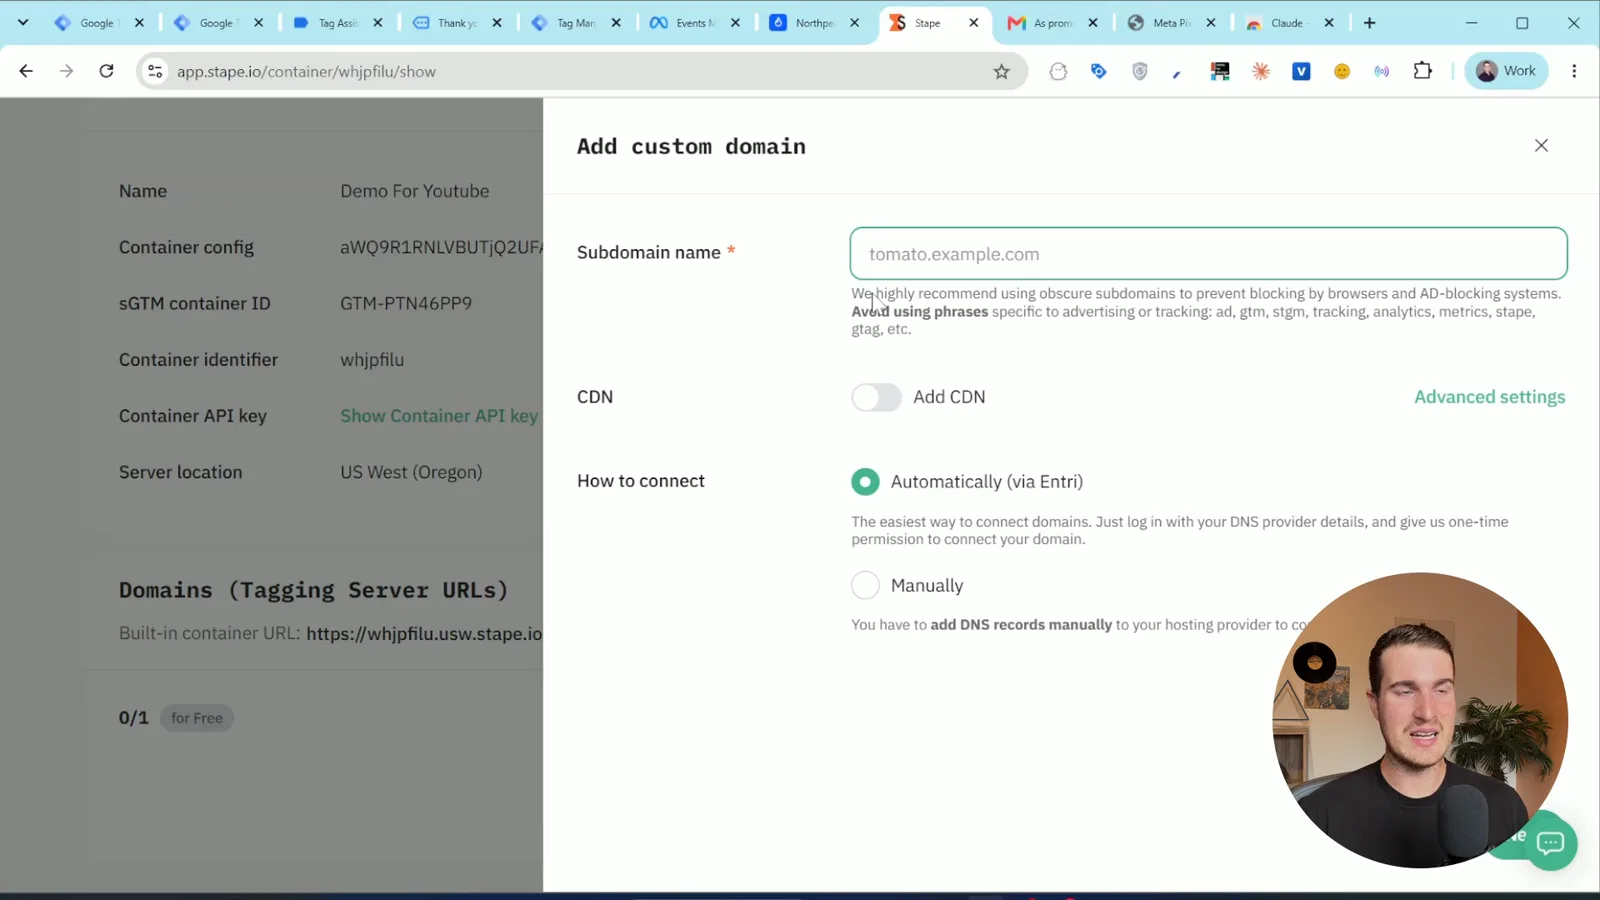
- Wait for it to show as verified. It usually takes about an hour and can take up to a day.
- In GTM, open the server container, go to Admin, then Container Settings, and replace the Stape URL with your subdomain. It has to start with
https://. - Preview the server container again. The debug screen should now open on your own subdomain.
- Run all the same tests again.
Always retest after a change. When live traffic is running is not the time to find a problem.
Step 10 (optional): Send the same data to GA4
If you also want these events in Google Analytics, add one tag in the server container.
- In the server container, go to Tags and create a new tag.
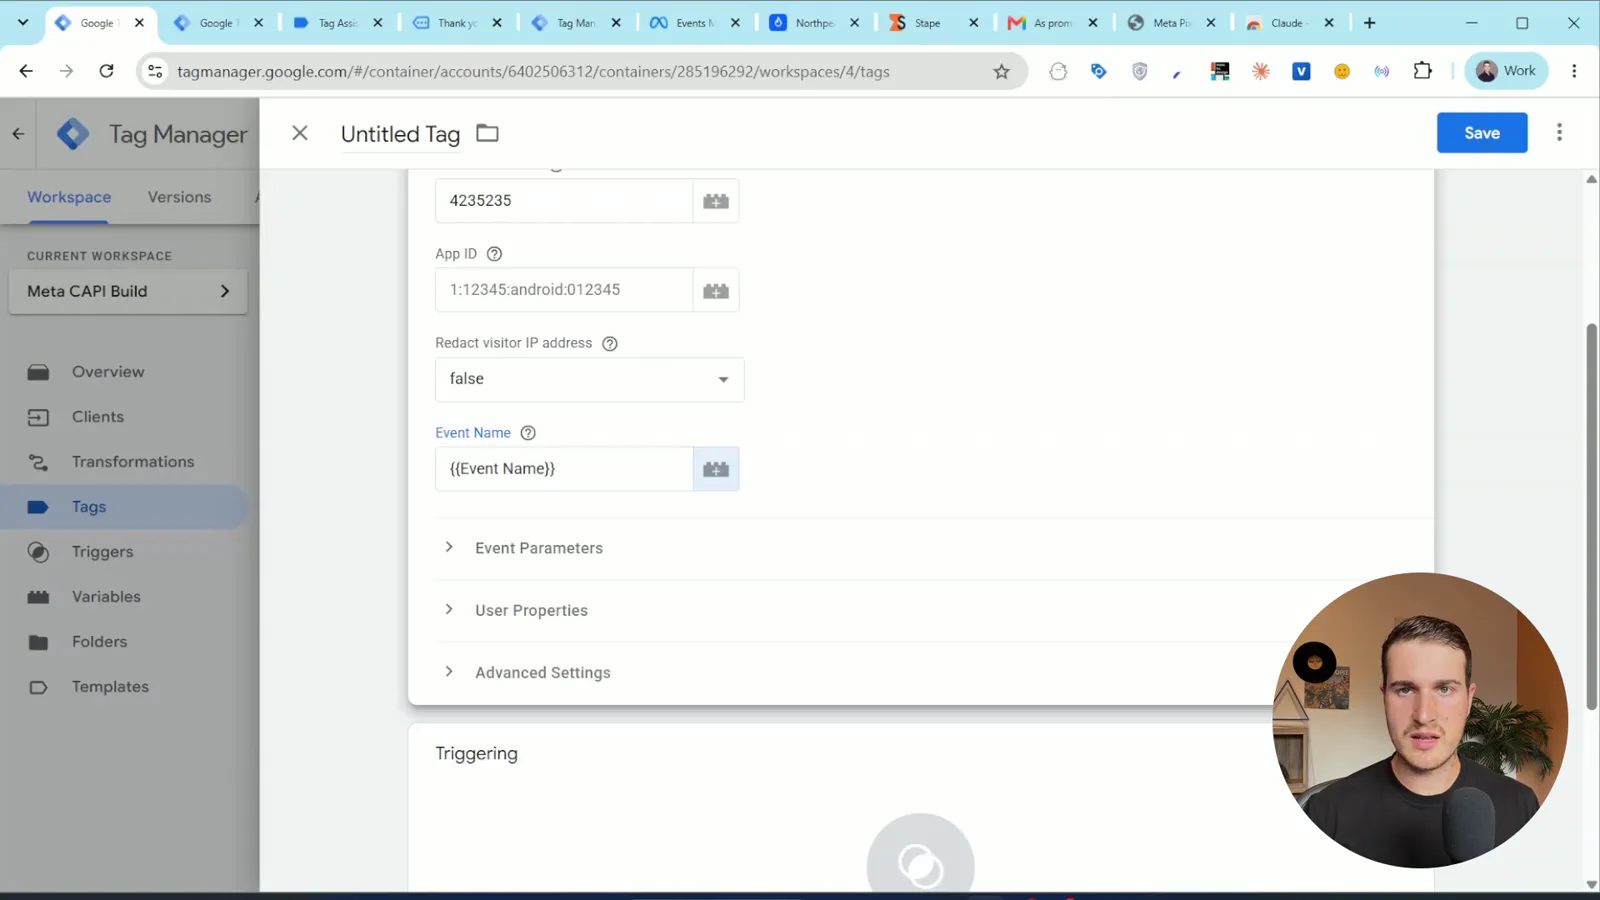
- Choose Google Analytics: GA4.
- Enter your real measurement ID, not the dummy one.
- For the event name, select the built-in Event Name variable. The tag will then send the same events you're sending to Meta.
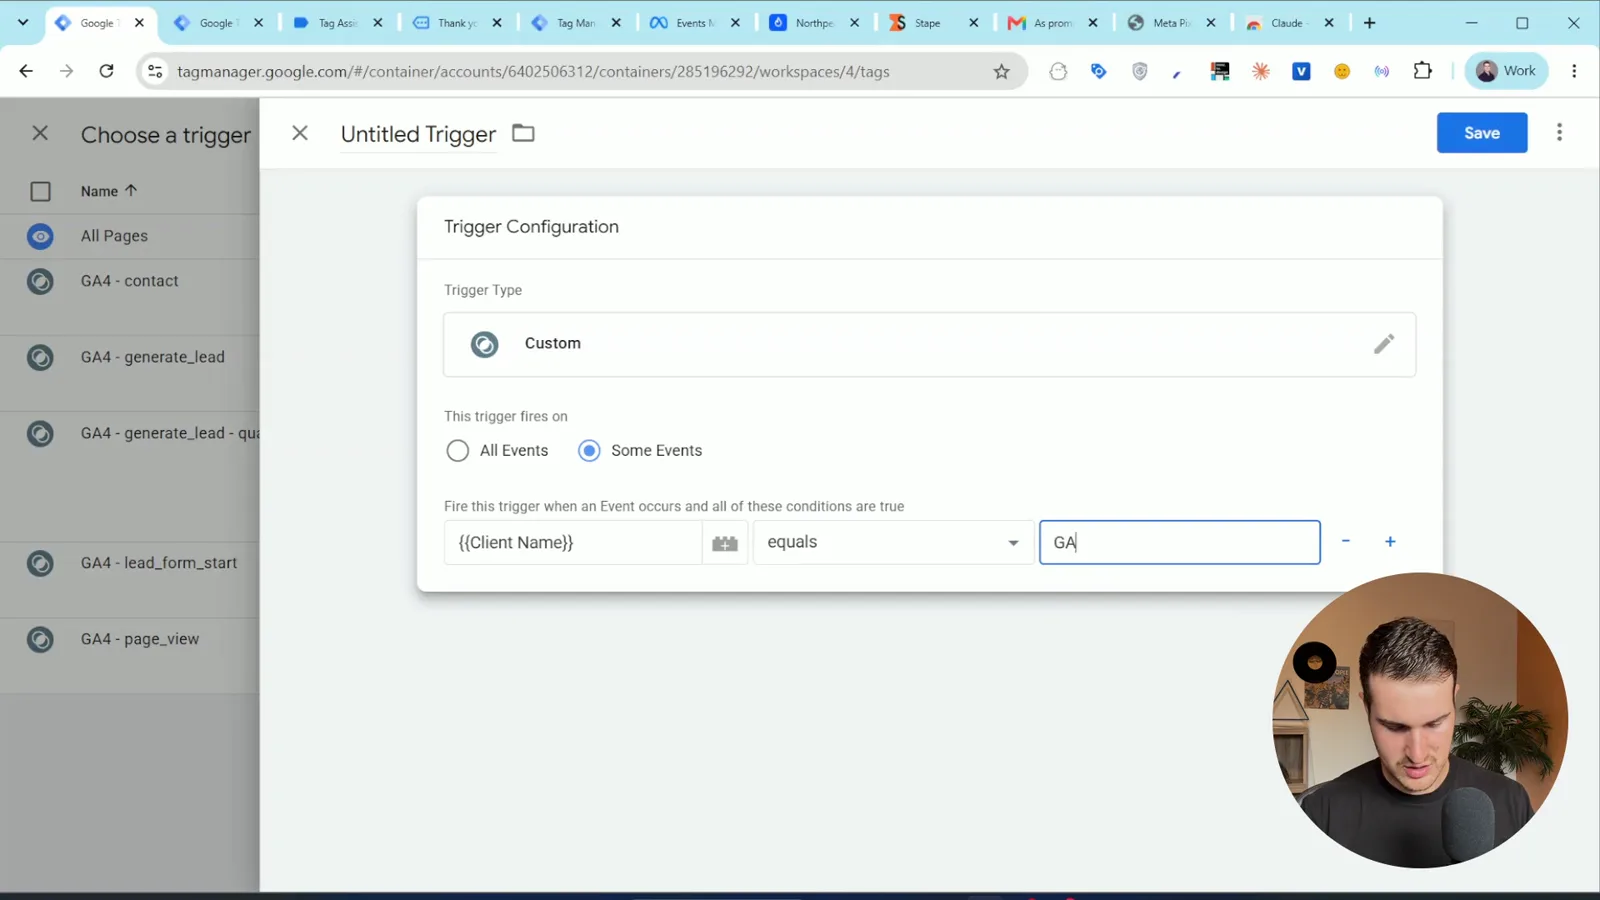
- For the trigger, create a custom trigger that fires when Client Name equals GA4.
- Save.
Publish both containers
Nothing is live until you publish.
- In the server container, click Submit. GTM writes a version name and description for you. Publish it.
- Do the same in the web container.
Common mistakes to avoid
- Clicking "Automatically provision tagging server" when you create the server container
- Leaving the access token as a placeholder in the server container's variables
- Leaving the GA4 measurement ID as Claude's placeholder
- Leaving the country set to US when your business is somewhere else
- Previewing the web container before the server container
- Expecting Meta Pixel Helper to show server events
- Putting the tracking server on your root domain, or on a subdomain that's already taken
- Forgetting to publish both containers after testing
Want us to do it with you?
If this feels like too much, you can book a call with Cedric. We can go through the whole setup together, finish one you've started, or review yours to make sure everything is connected properly. One call is usually enough.