Like many aspiring business owners and marketers, you may be looking for new tools to help you work smarter instead of harder.
Shopify’s Conversion API will allow you to sync important data between your Shopify and Facebook accounts which you can analyze to better your marketing strategy.
Since the Facebook Pixel has lost its power due to privacy policies, it is less effective. It pulls data from the user’s browser using cookies, unlike the Facebook Conversion API through Shopify, which uses the server.
So what’s the catch? Well, you may find it slightly confusing. That’s why we’re here! In this article, you’ll find a clear guide to downloading this API and using it to your advantage by sending all kinds of events to your Facebook Pixel.
If you would like a more audiovisual step by step guide, we made a video on the topic linked below.
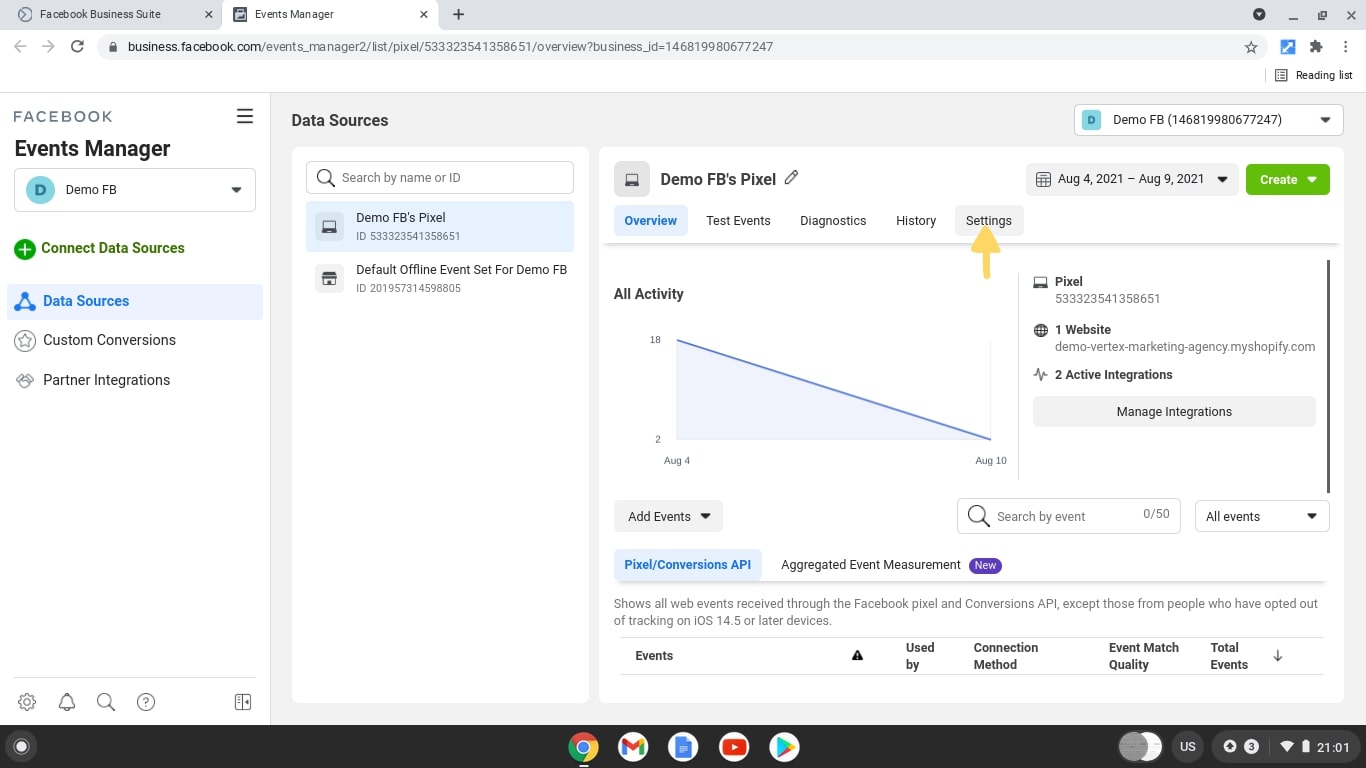
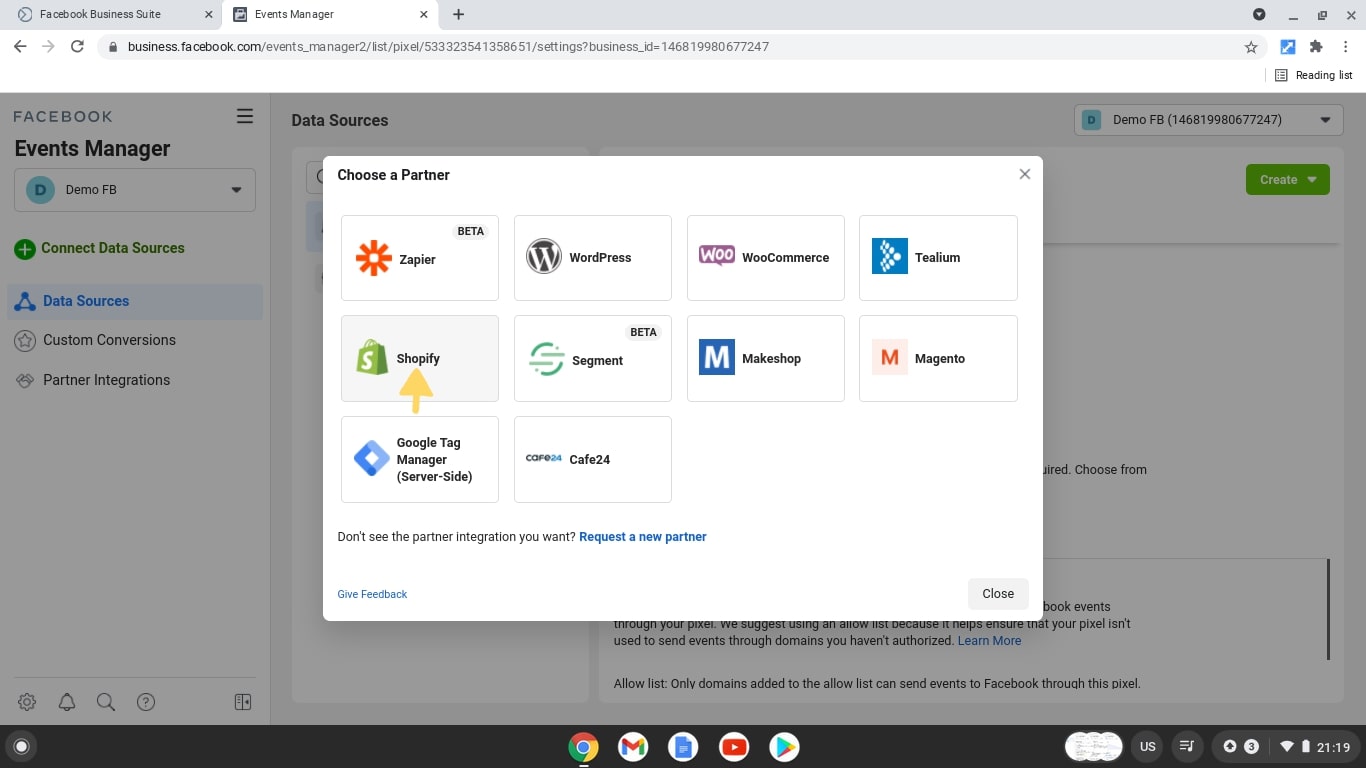
1. Enable Shopify as a Partner
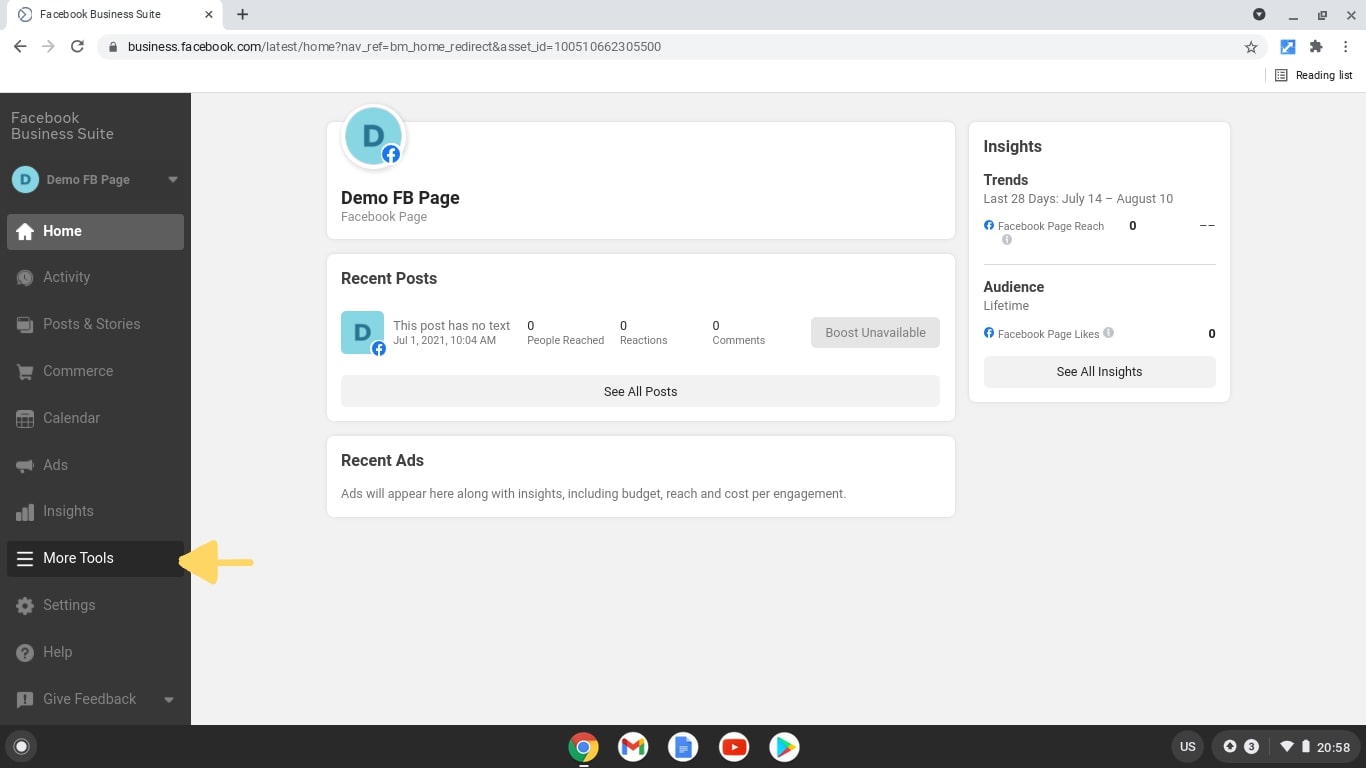
1. Navigate to https://business.facebook.com/
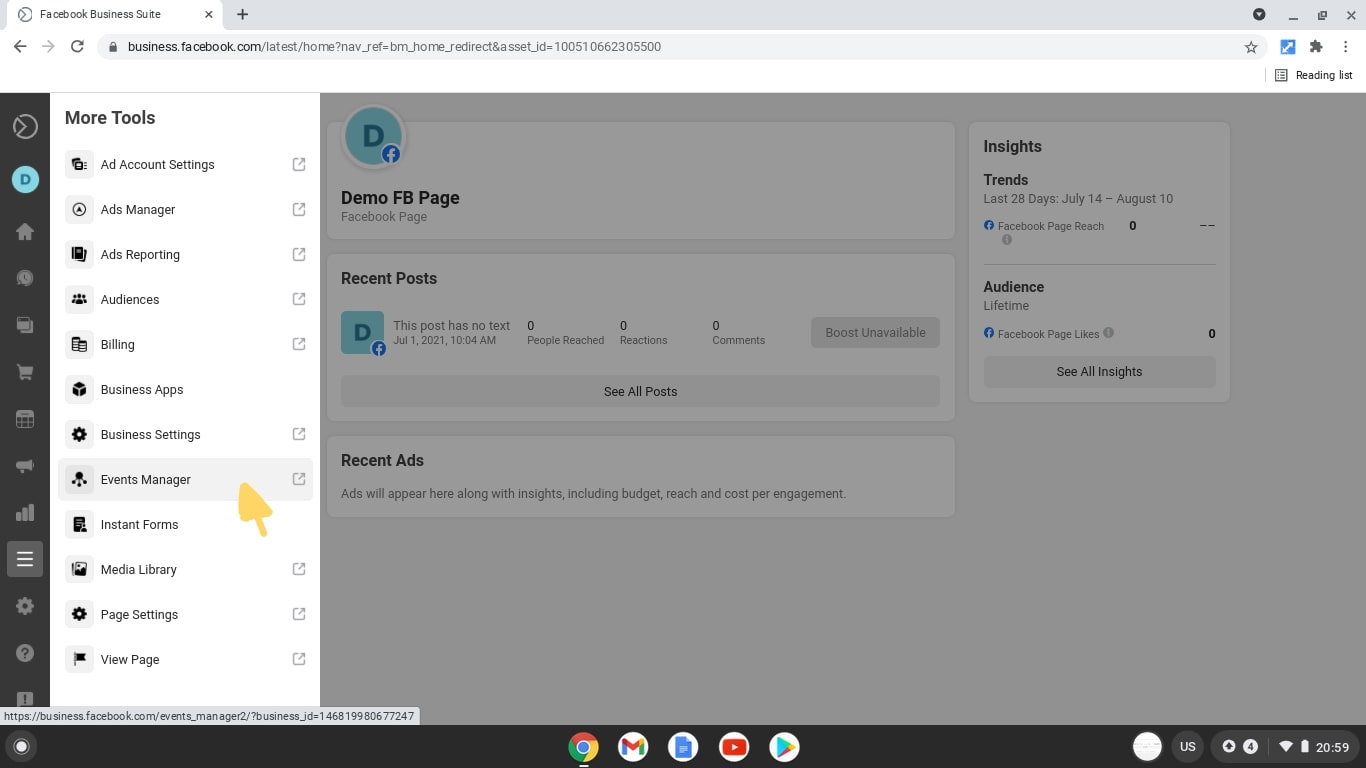
2. In the sidebar to the left of your screen, click on the hamburger (three lines stacked on top of eachother marked as More tools).
2. Add the Facebook App in Shopify
You’ll then need to head over to your Shopify store and log in to your dashboard. Then follow these steps:
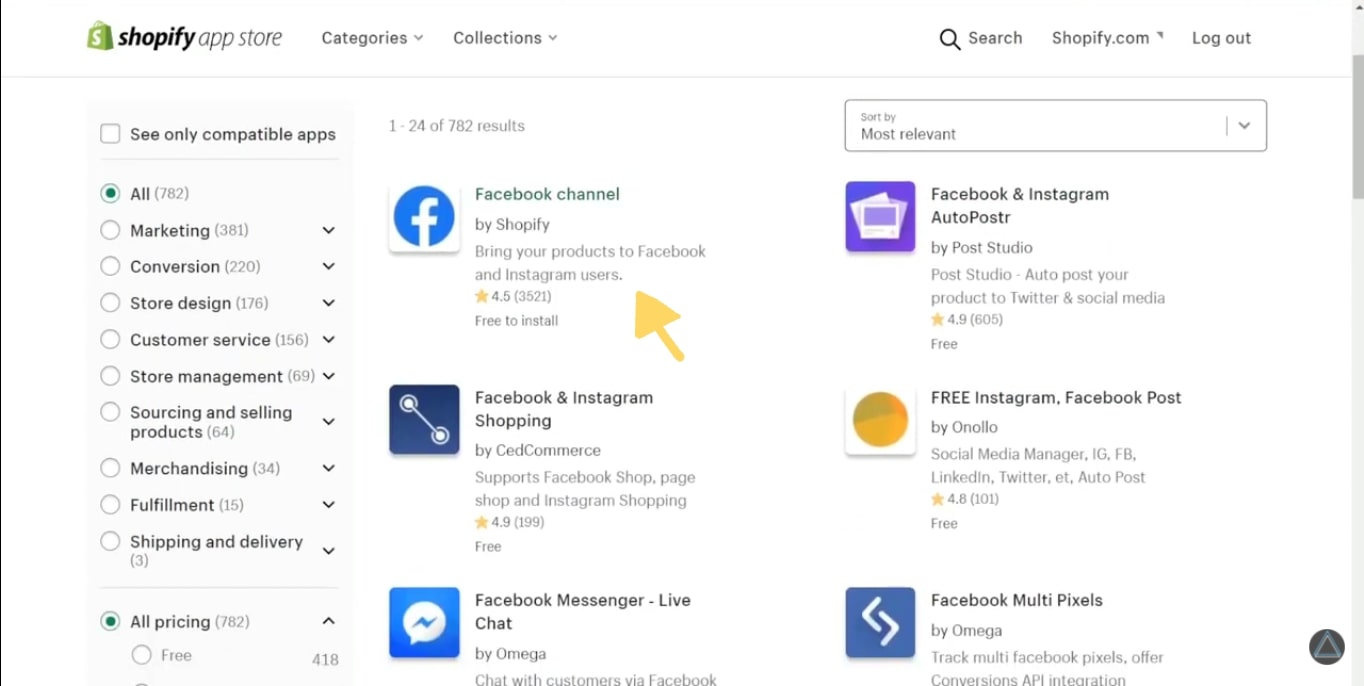
2. Type Facebook into the search bar. You’ll find several results for that query, so look for the Facebook Channel and click add app.
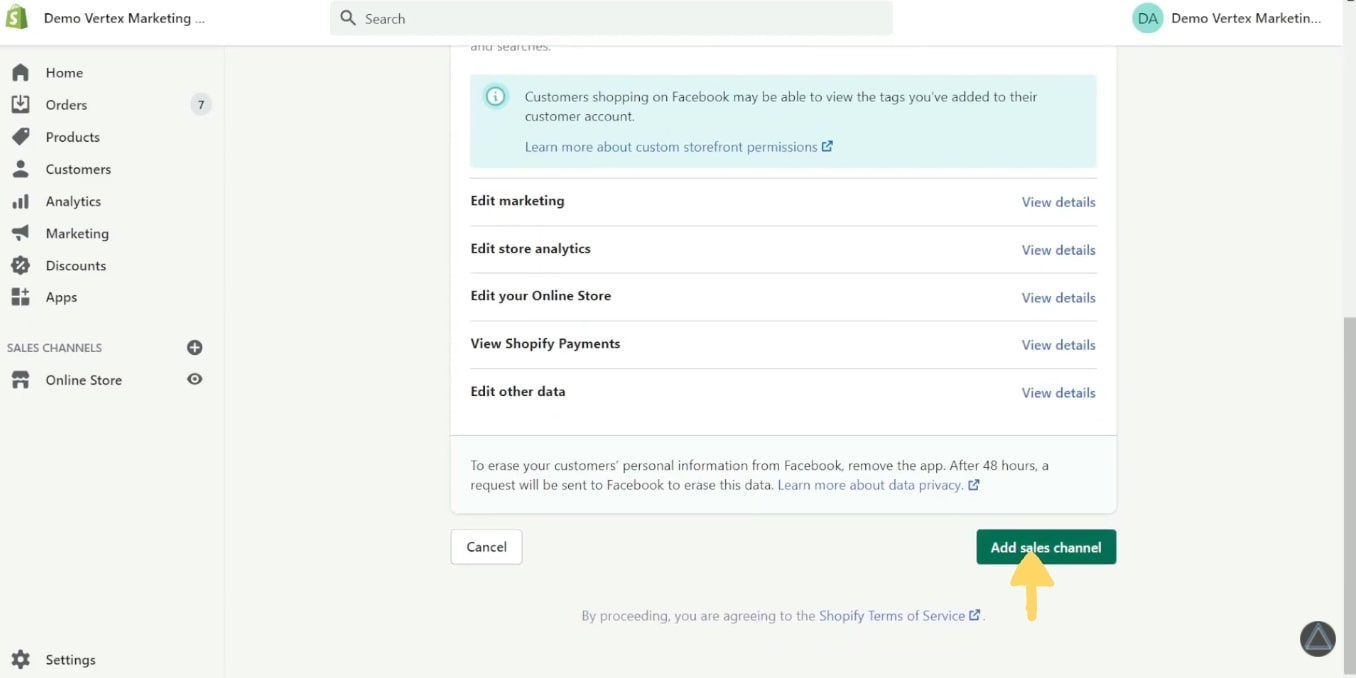
3. Once the page that notifies you of the download appears, scroll down and click add sales channel.
3. Setup the Shopify and Facebook Integration
It’s quite possible that you already had the app downloaded if you recognize the icon and sales channel.
If you’ve made it this far, congrats! You have successfully installed the Facebook app on your Shopify.
Now, we have to set it up; click the start setup button.
Google needs you to verify that you are the owner of your buisness before you can sign up for cloud identity.
If it isn’t verified, I made a video on the topic, where you’ll find three different ways you can verify your domain in Business Manager.
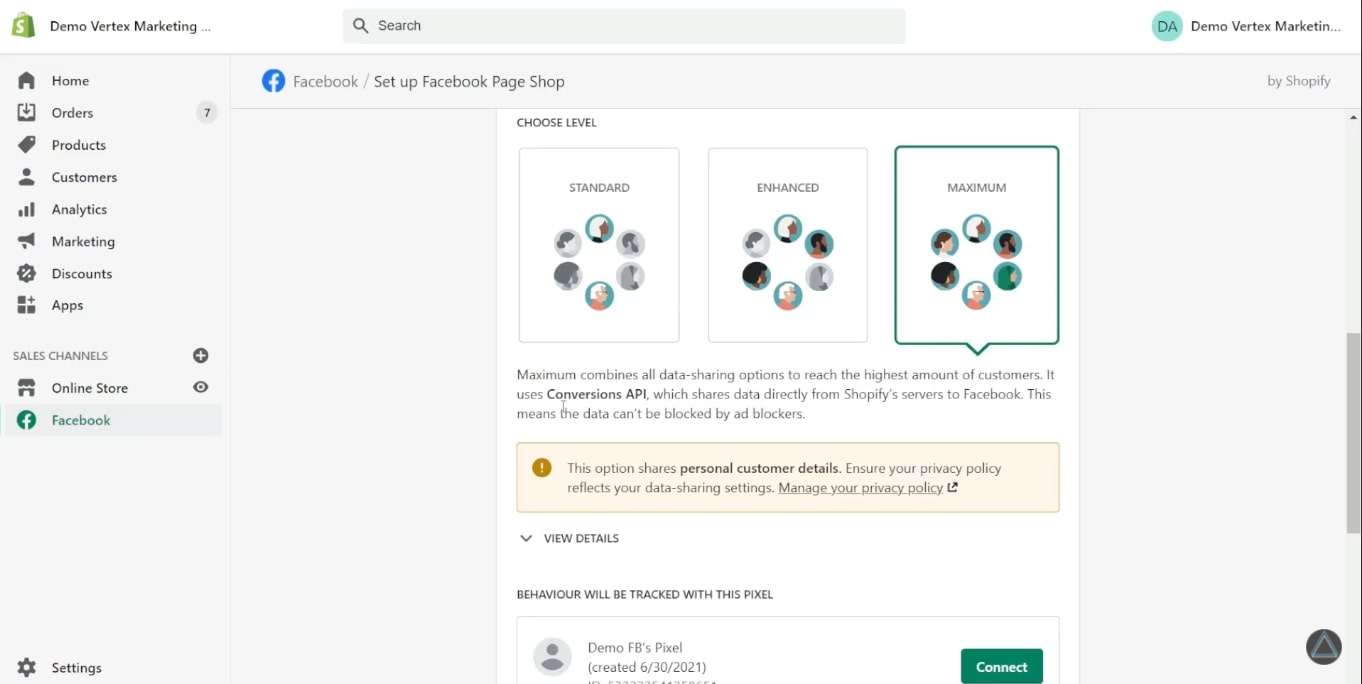
5. Moving onto the Data Sharing section, it will ask you to choose the level. Select Maximum, since it uses the Conversions API.
This is the purpose of this whole article!
It will allow you to share data directly from your Shopify server to your Facebook server (explained more in depth below).
The Maximum Setting: Explained
Up until recently, yes. In an email from their support team, shopify explains that you can now track all six of the standard Pixel events between the platforms as well as through javascript via the browser.
In our experience with clients, the events were successfully transferred from the browser and the server.
We have, however, noticed some difficulties with integration, so make sure everything is enabled and is sending correctly. Pay attention to any error messages.
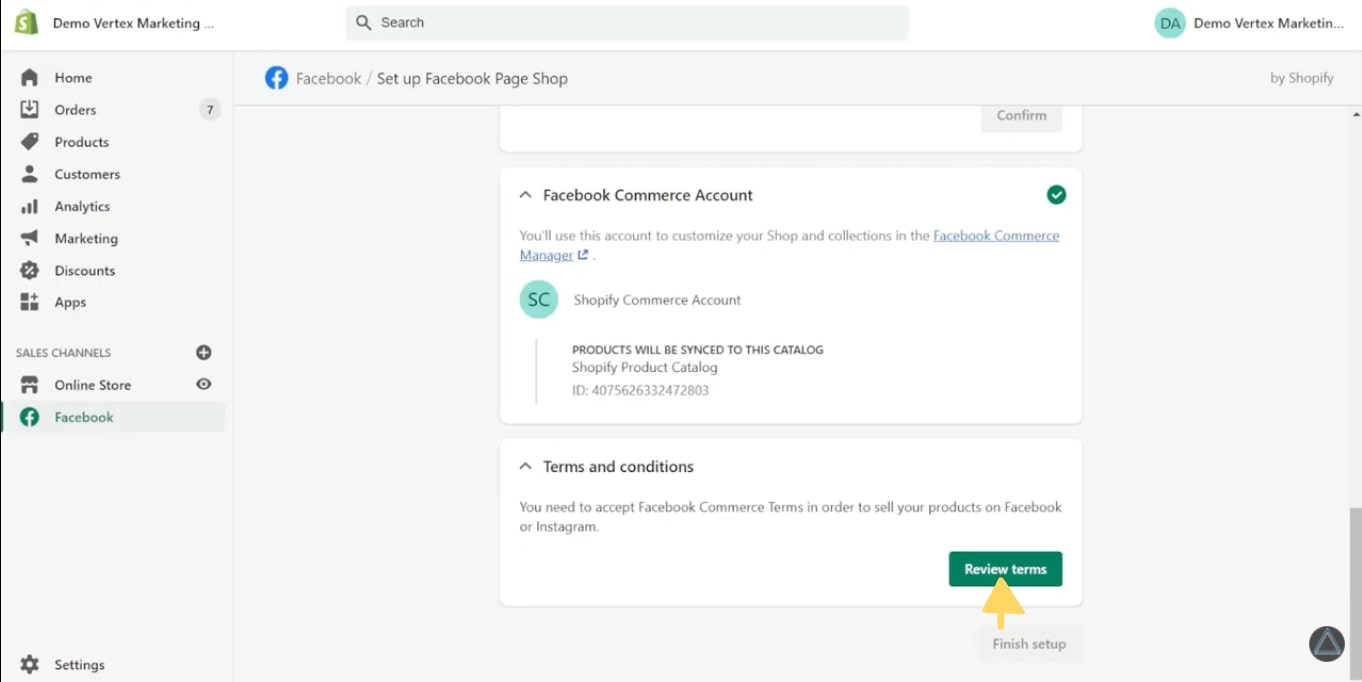
5. Connect a Facebook Commerce Account. If you don’t have one already, click on the button to create one.
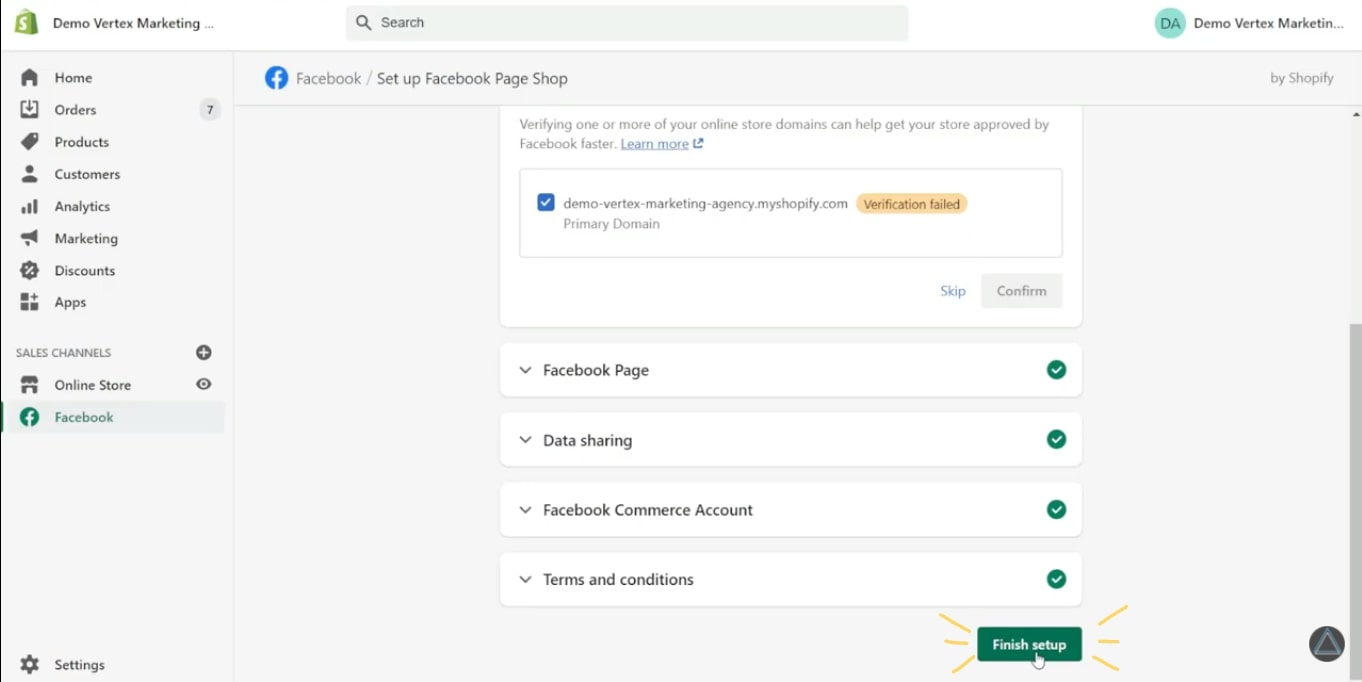
6. Review the Terms and Conditions and accept them…
And finally, DRUMROLL PLEASE,
To summarize
- Enable Shopify as a partner.
- Add the Facebook app in Shopify
- Setup the shopify and Facebook integration
If you have any questions or comments, feel free to add them to the blog. Our team is always happy to help!
About The Author:

Cedric Potvin
Facebook ad specialist
As a Facebook ad specialist at Vertex Marketing Agency, Cedric manages a lot of different ad accounts and spends a lot of money on Facebook ads. His goal is to share what he learns with the rest of the population.


