How to Install the Facebook Pixel on Your Website With GTM
In this article, I will show you how to properly install the basic Facebook pixel on your website.
After this step-by-step guide, you’ll be able to retarget Facebook users that have visited a specific page on your website.
Prefer seeing this detailed guide in a video format?
Storing Your Facebook Pixel in Google Tag Manager
Instead of placing your Facebook pixel directly on your website, it’s best practice to use a tag management system like Google Tag Manager.
The reason for this is because you will want to add more functionality to your Facebook pixel and track things like conversions values or other things that the Facebook pixel cannot do.
Also, each advertising platform (Facebook, Google, LinkedIn, Twitter…) all have their own pixel and tracking codes. Imagine having to configure all these on your website. With Google Tag Manager you need to install it once on your website and simply add your tracking codes in the tool. NO CODING SKILLS REQUIRED!
1. Create & Install Google Tag Manager on Your Website
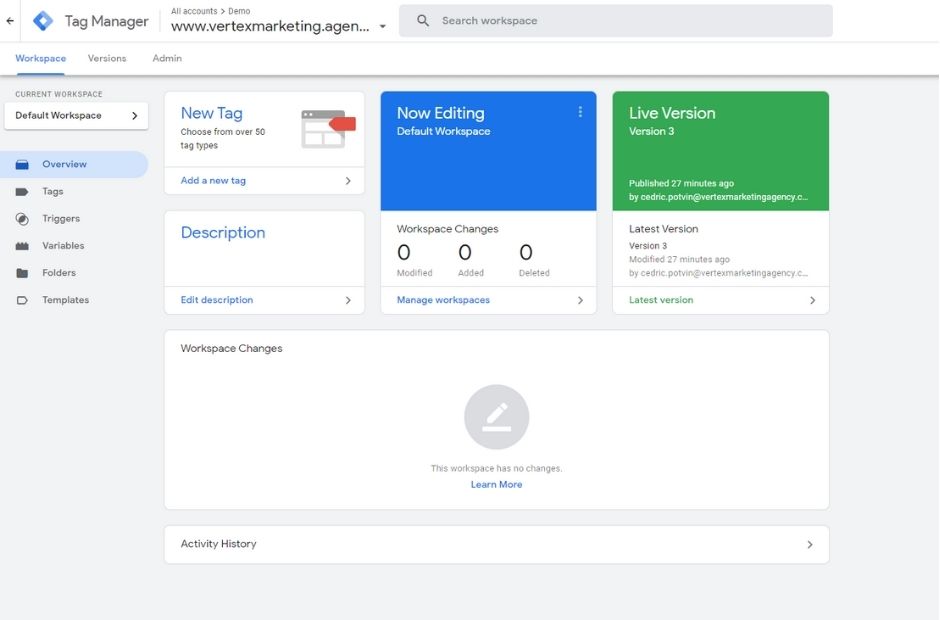
The first step is to create a free Google Tag Manager (GTM) account. This process is quite simple and once you’ve completed the registration you should see something like this:
For this walkthrough, we are going to be using WordPress as our CMS system. If your website is one Shopify, Wix, PageCloud… the process is really similar.
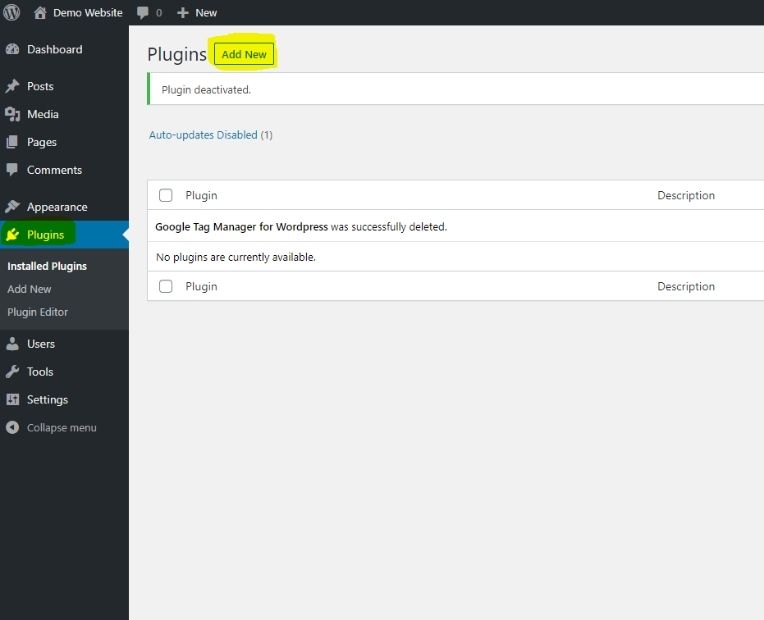
1. Navigate to the “Plugins” section on the sidebar
2. Click the “Add New” button.
3. In the search bar type “Google Tag Manager“.
4. Locate the “Google Tag Manager for WordPress” plugin by “Thomas Geiger“.
5. Click the “Install Now” button and then “Activate“.
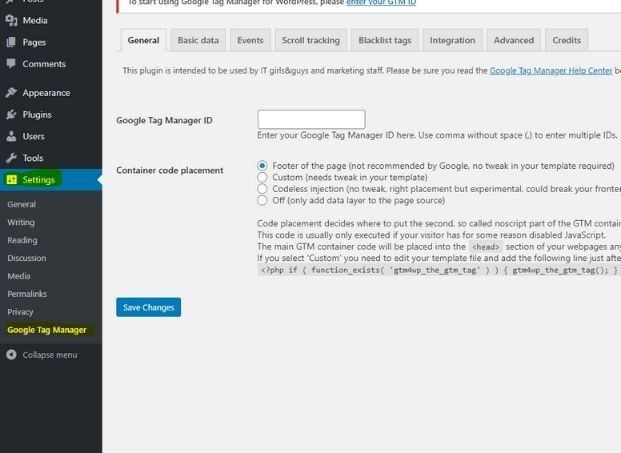
6. Navigate to the plugin we just installed Settings > Google Tag Manager.
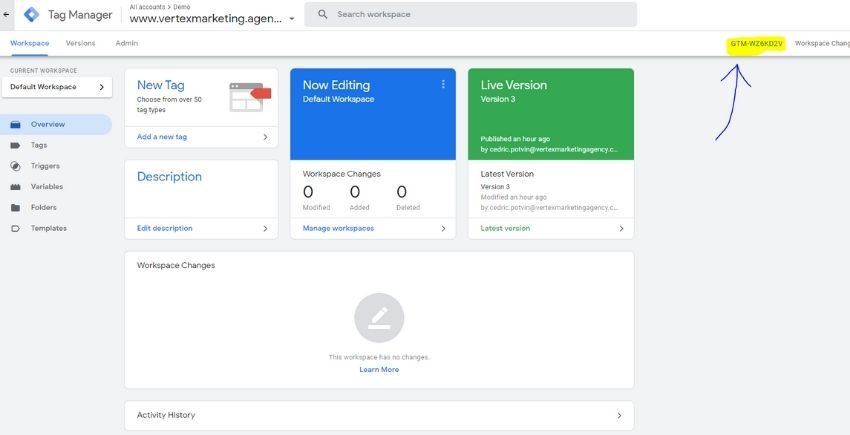
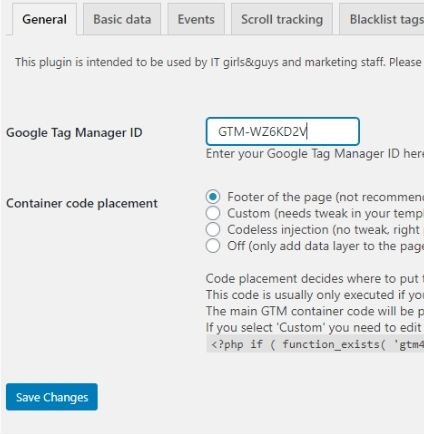
7. Go into Google Tag Manager to copy your ID and paste it into the ID input.
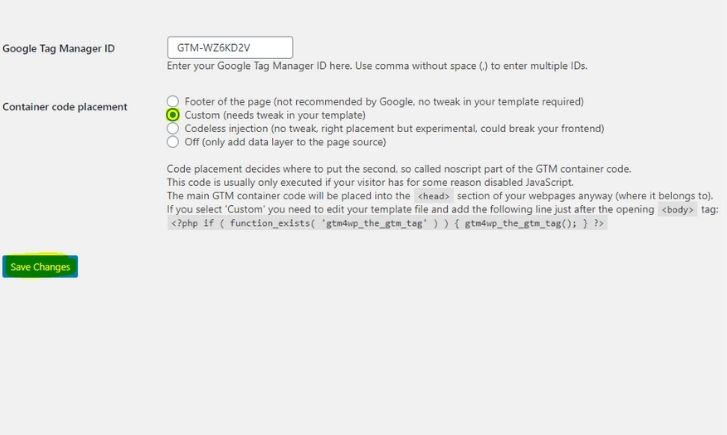
8. In the “Container code placement” section please select “Custom (needs tweak in your template)“ and click “Save Changes“.
9. Copy the code here:
<?php if ( function_exists( ‘gtm4wp_the_gtm_tag’ ) ) { gtm4wp_the_gtm_tag(); } ?>
Navigate to “Appearance > Theme Editor” and locate & click “Theme Header“.
10. Right under the first opening “<body” tag insert the code you just copied above and click “Update File“.
Congrats! Google Tag Manager is now installed on your website.
2. Add Your Facebook Pixel in Google Tag manager
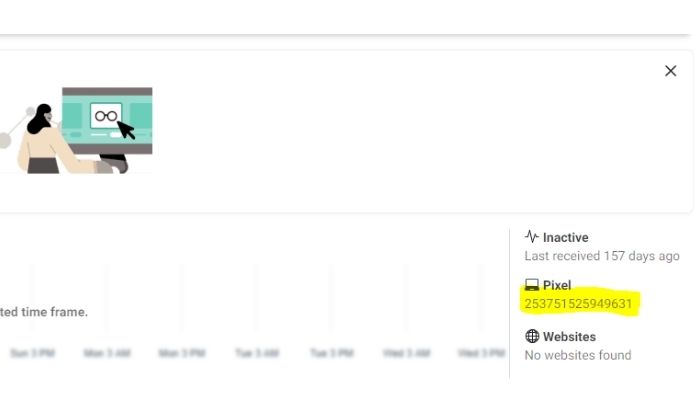
1. You’ll need to locate your Facebook pixel ID by going to Facebook Ads Manager > Events Manager.
2. Click to copy the pixel ID and save it somewhere.
3. Navigate back to Google Tag Manager and click on “Tags” and click “New“
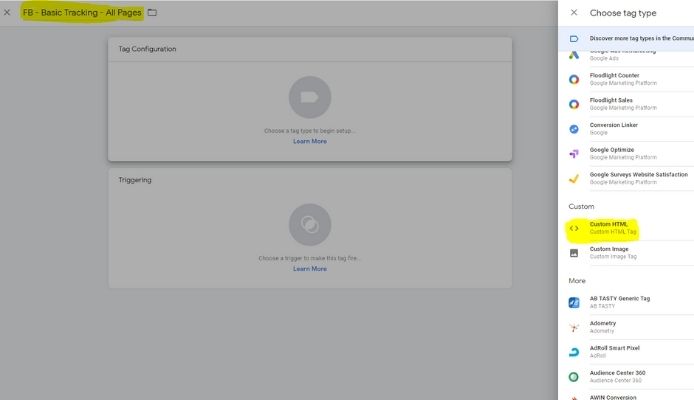
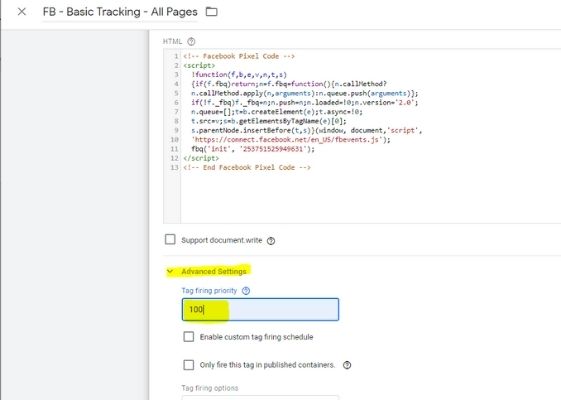
4. Name your tag “FB – Basic Tracking – All Pages“, click “Tag Configuration” and chose the option “Custom HTML“.
5. Now enter the code below and where it says “ENTER-YOUR-ID” enter your FB pixel ID:
<!– Facebook Pixel Code –>
<script>
!function(f,b,e,v,n,t,s)
{if(f.fbq)return;n=f.fbq=function(){n.callMethod?
n.callMethod.apply(n,arguments):n.queue.push(arguments)};
if(!f._fbq)f._fbq=n;n.push=n;n.loaded=!0;n.version=’2.0′;
n.queue=[];t=b.createElement(e);t.async=!0;
t.src=v;s=b.getElementsByTagName(e)[0];
s.parentNode.insertBefore(t,s)}(window, document,’script’,
‘https://connect.facebook.net/en_US/fbevents.js’);
fbq(‘init’, ‘ENTER-YOUR-ID’);
</script>
<!– End Facebook Pixel Code –>
6. Click on “Advanced Settings” and add a “Tag firing priority” of “100“.
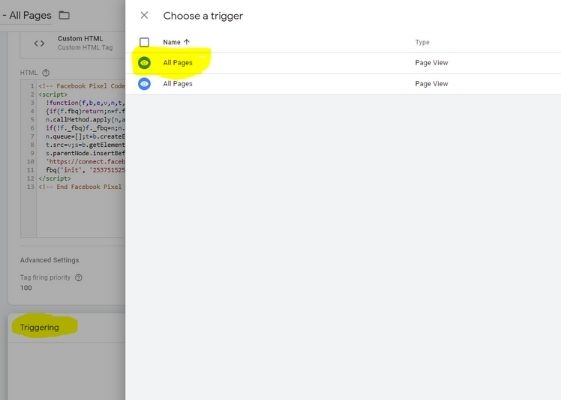
7. Click on “Triggering“, chose the option “All Pages” and click the “Save” button in the top right corner.
8. Now we need to add one more tag so again repeat the process, click on “New“, name this tag “FB – Pageview – All Pages“, click “Tag Configuration” and chose “Custom HTML“.
9. Paste this exact code in the HTML section:
<script>
fbq(‘track’, ‘PageView’);
</script>
10. Once again, click on “Triggering“, chose the option “All Pages” and click the “Save” button in the top right corner.
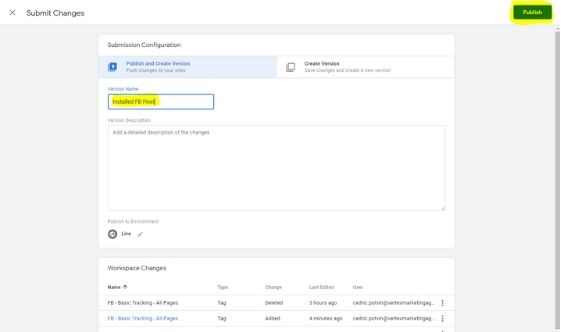
11. The last step is to simply publish your changes by clicking the “Submit” button at the top right and give it a name like “Installed FB pixel” and click “Publish“.
Need Assistance With The Installation?
Implementing the Facebook pixel on your website is a must whether you’re running Facebook ads or not!
If you need any help or have questions about implementing a Facebook pixel on your website we at Vertex can help you with that and help you track some more advanced things like conversions.

